

Renan Fabricio explains how he posed John Constantine as a MultiVersus game character in this fan art masterpiece for Blender.
Renan Fabricio
My name is Renan Fabricio, a 3D Character Artist from Brazil with 7 years of experience in the game industry. I currently work at Revolving Games. Most of my career has been remote due to the lack of game studios in Rio de Janeiro when I started.
Initially, I worked on various projects creating one or two characters each. In 2019, I pursued full-time remote opportunities and was hired by a Brazilian indie studio to develop a vertical slice for the Soulslike game Deathbound. During that year, I designed 7 characters for the demo, which helped secure investment from Tate Multimedia, allowing us to complete the game. I'm proud of this achievement, though I am no longer with the studio.
For the past two and a half years, I've been a 3D Artist at Revolving Games, working on undisclosed projects.
Introduction - Posing characters in an existing game
Constantine, a DC character, holds a special place in my heart and in the hearts of many Brazilians due to the 2005 film starring Keanu Reeves. With this in mind, I decided to create a 3D stylized version of Constantine from the comics, as this game features DC characters. This article will not only demonstrate the workflow of character creation but also posing characters in Character Creator.
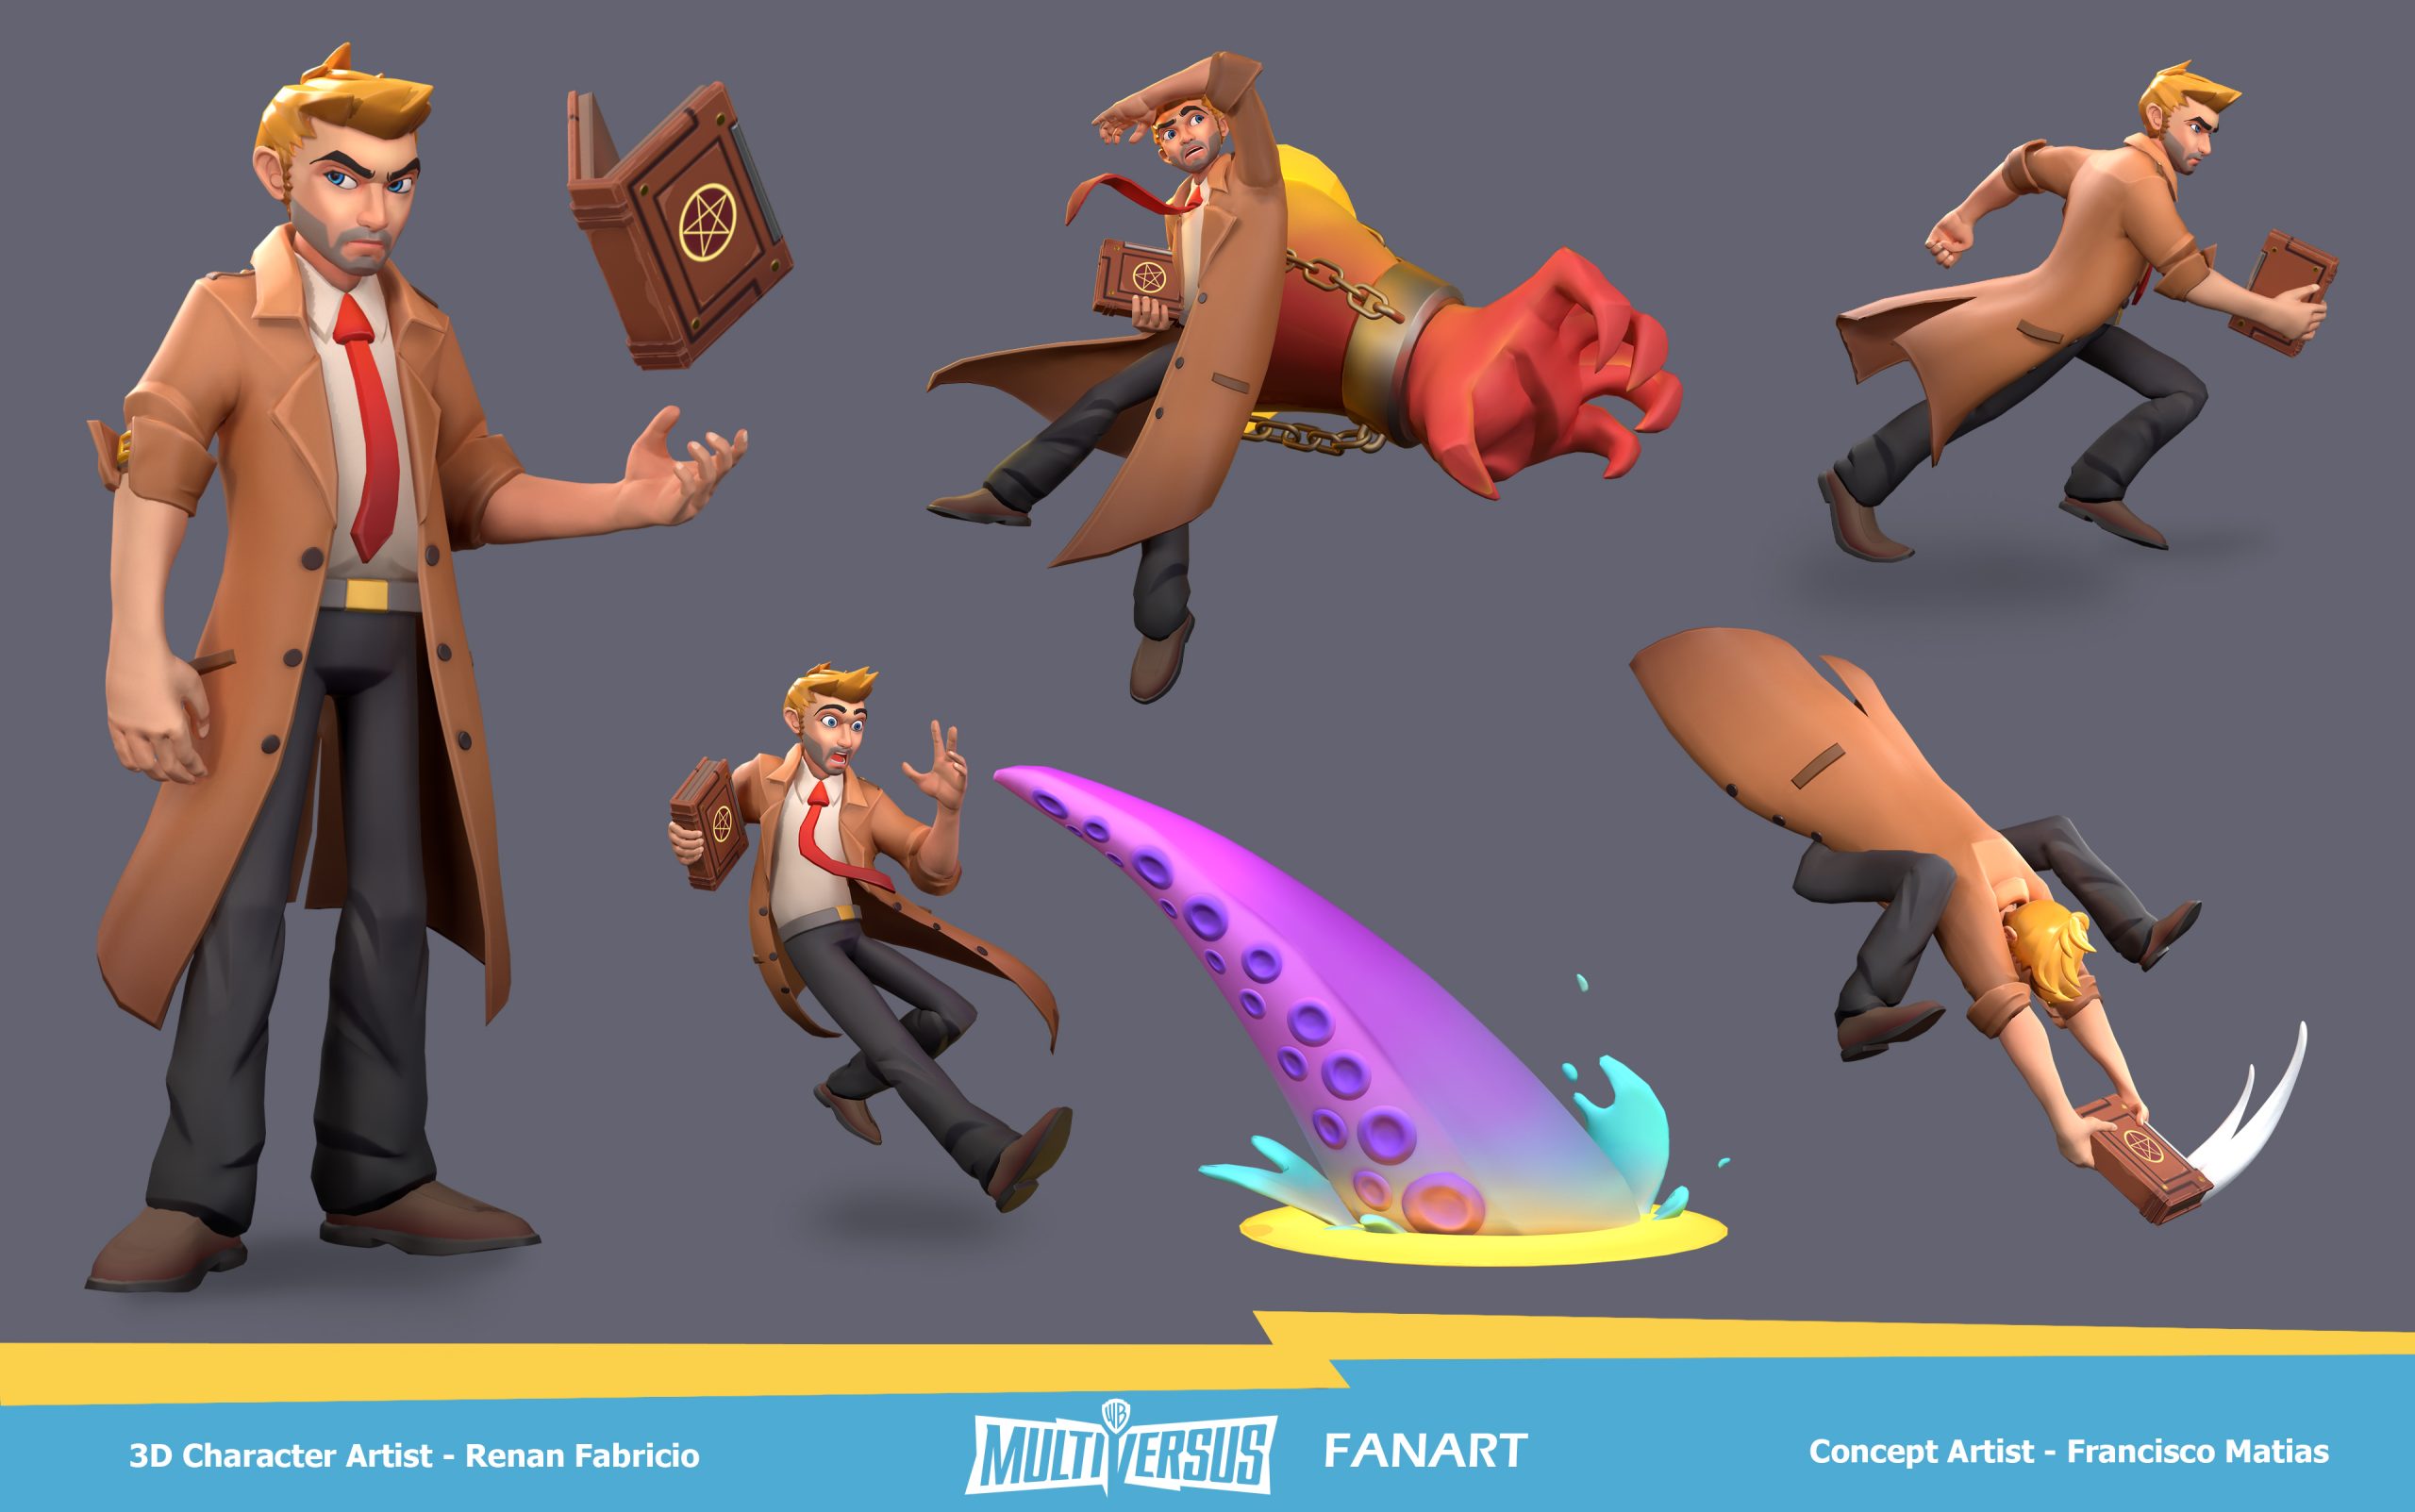
My personal fanart project of Constantine for the MultiVersus Game
Driven by my love for fighting games and the desire to work on projects like Multiversus, I sought out someone on ArtStation who was creating Multiversus fan art concepts. I wanted a collaborator who could create a 2D concept, allowing me to focus on the 3D design.
I found Francisco Matias, also a Brazilian, who graciously accepted my invitation and created 2D concepts of Constantine. I am very grateful to him for believing in this collaborative fan art project.

These are the poses I ended up creating in 3D; also illustrated by Francisco Matias.
Every time I embark on a long personal project, I strive to incorporate a new software, addon, or technique into my workflow. This approach ensures that my process becomes more efficient, faster, and stays aligned with industry standards.
Previously, I noticed that posing characters in ZBrush took a considerable amount of time and was one of the most challenging steps for me, especially since I am not a professional rigger. Posing seemed quite daunting, particularly when I needed to create multiple poses for the same character. I aimed to showcase the character in at least four different poses, along with additional props, to highlight various aspects of the design.
I began my search for auto rigs on YouTube and stumbled upon an incredibly detailed tutorial of Character Creator 4 on Michael Pavlovich's channel. I highly recommend checking it out, as it enabled me to start working in CC4 in less than a full day.
Blockout in ZBrush
During the blockout stage, my primary focus is on resolving proportions. It's much easier to address this early on rather than having to make adjustments later with multiple subtools. Following this, I block out the main shapes of the character and its clothing, ensuring that the silhouette works effectively. The meshes may appear messy at this stage, but they serve as a base for the subsequent step, which involves retopology in Blender.
Timelapse of the blockout stages.
Retopology with Blender Add-on
I've been using Blender for about three years now, and I've been thoroughly enjoying my time with it. I'd like to recommend a paid add-on called RetopoFlow for anyone interested. While I used to do retopology in 3ds Max or TopoGun, I always aim to consolidate my workflow within a single software.
I've found Blender to be incredibly powerful for retopology tasks, including making seams and unwrapping UVs. Investing in RetopoFlow has significantly sped up my workflow and streamlined my retopology process.
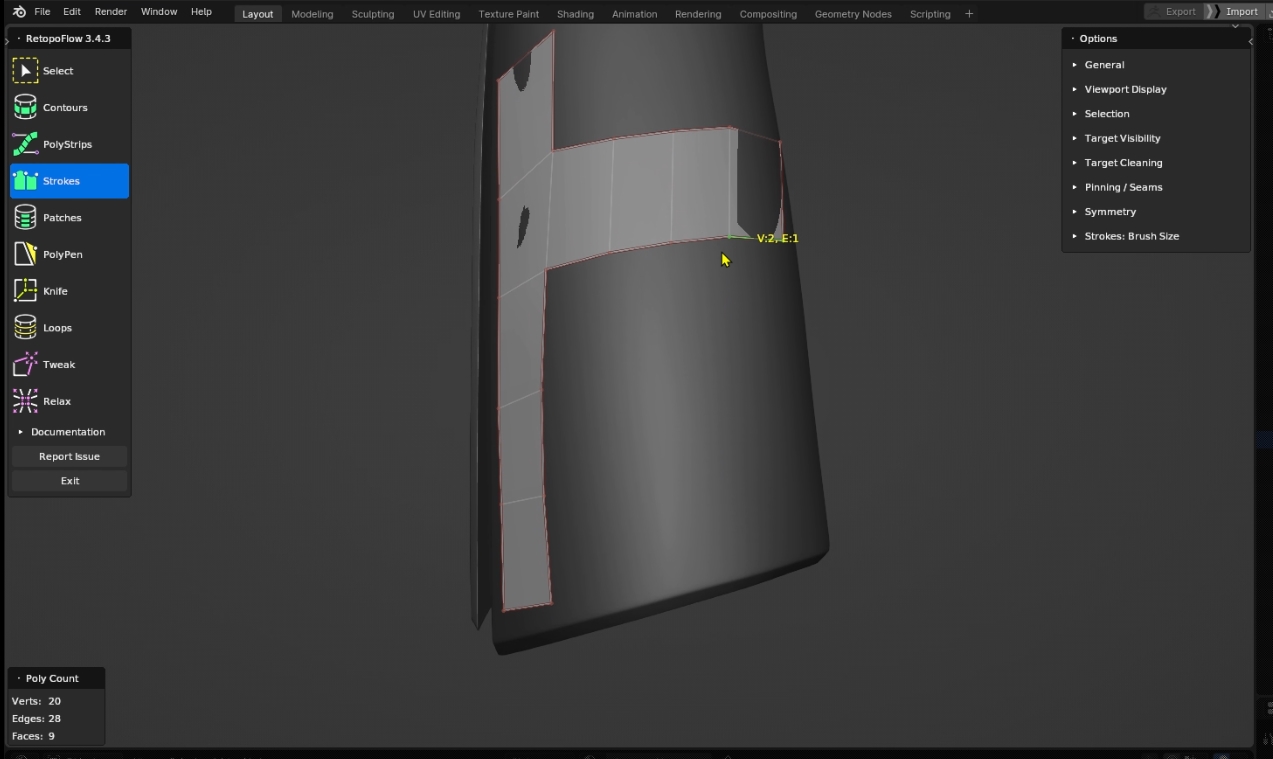
Using RetopoFlow addon in Blender.
UVing with Blender Addon
Another paid Blender add-on that I absolutely love is UVpackmaster. It automates UV mapping in an incredibly organized manner, unlike anything I've seen before, and it's remarkably fast.
What's more, it allows you to seamlessly transition between manually organizing your UVs and automatically filling in gaps with less important shells. This significantly reduces the time spent on UV mapping and streamlines your workflow. Additionally, it includes quadify tools, making it particularly effective for cylindrical objects, belts, straps, or even thin and straight UV shells.

Returning to ZBrush with the new topology geometry, I utilized it as a base mesh to create the high-poly model. Given that the character features simplified information and a stylized design, this process was expedited.
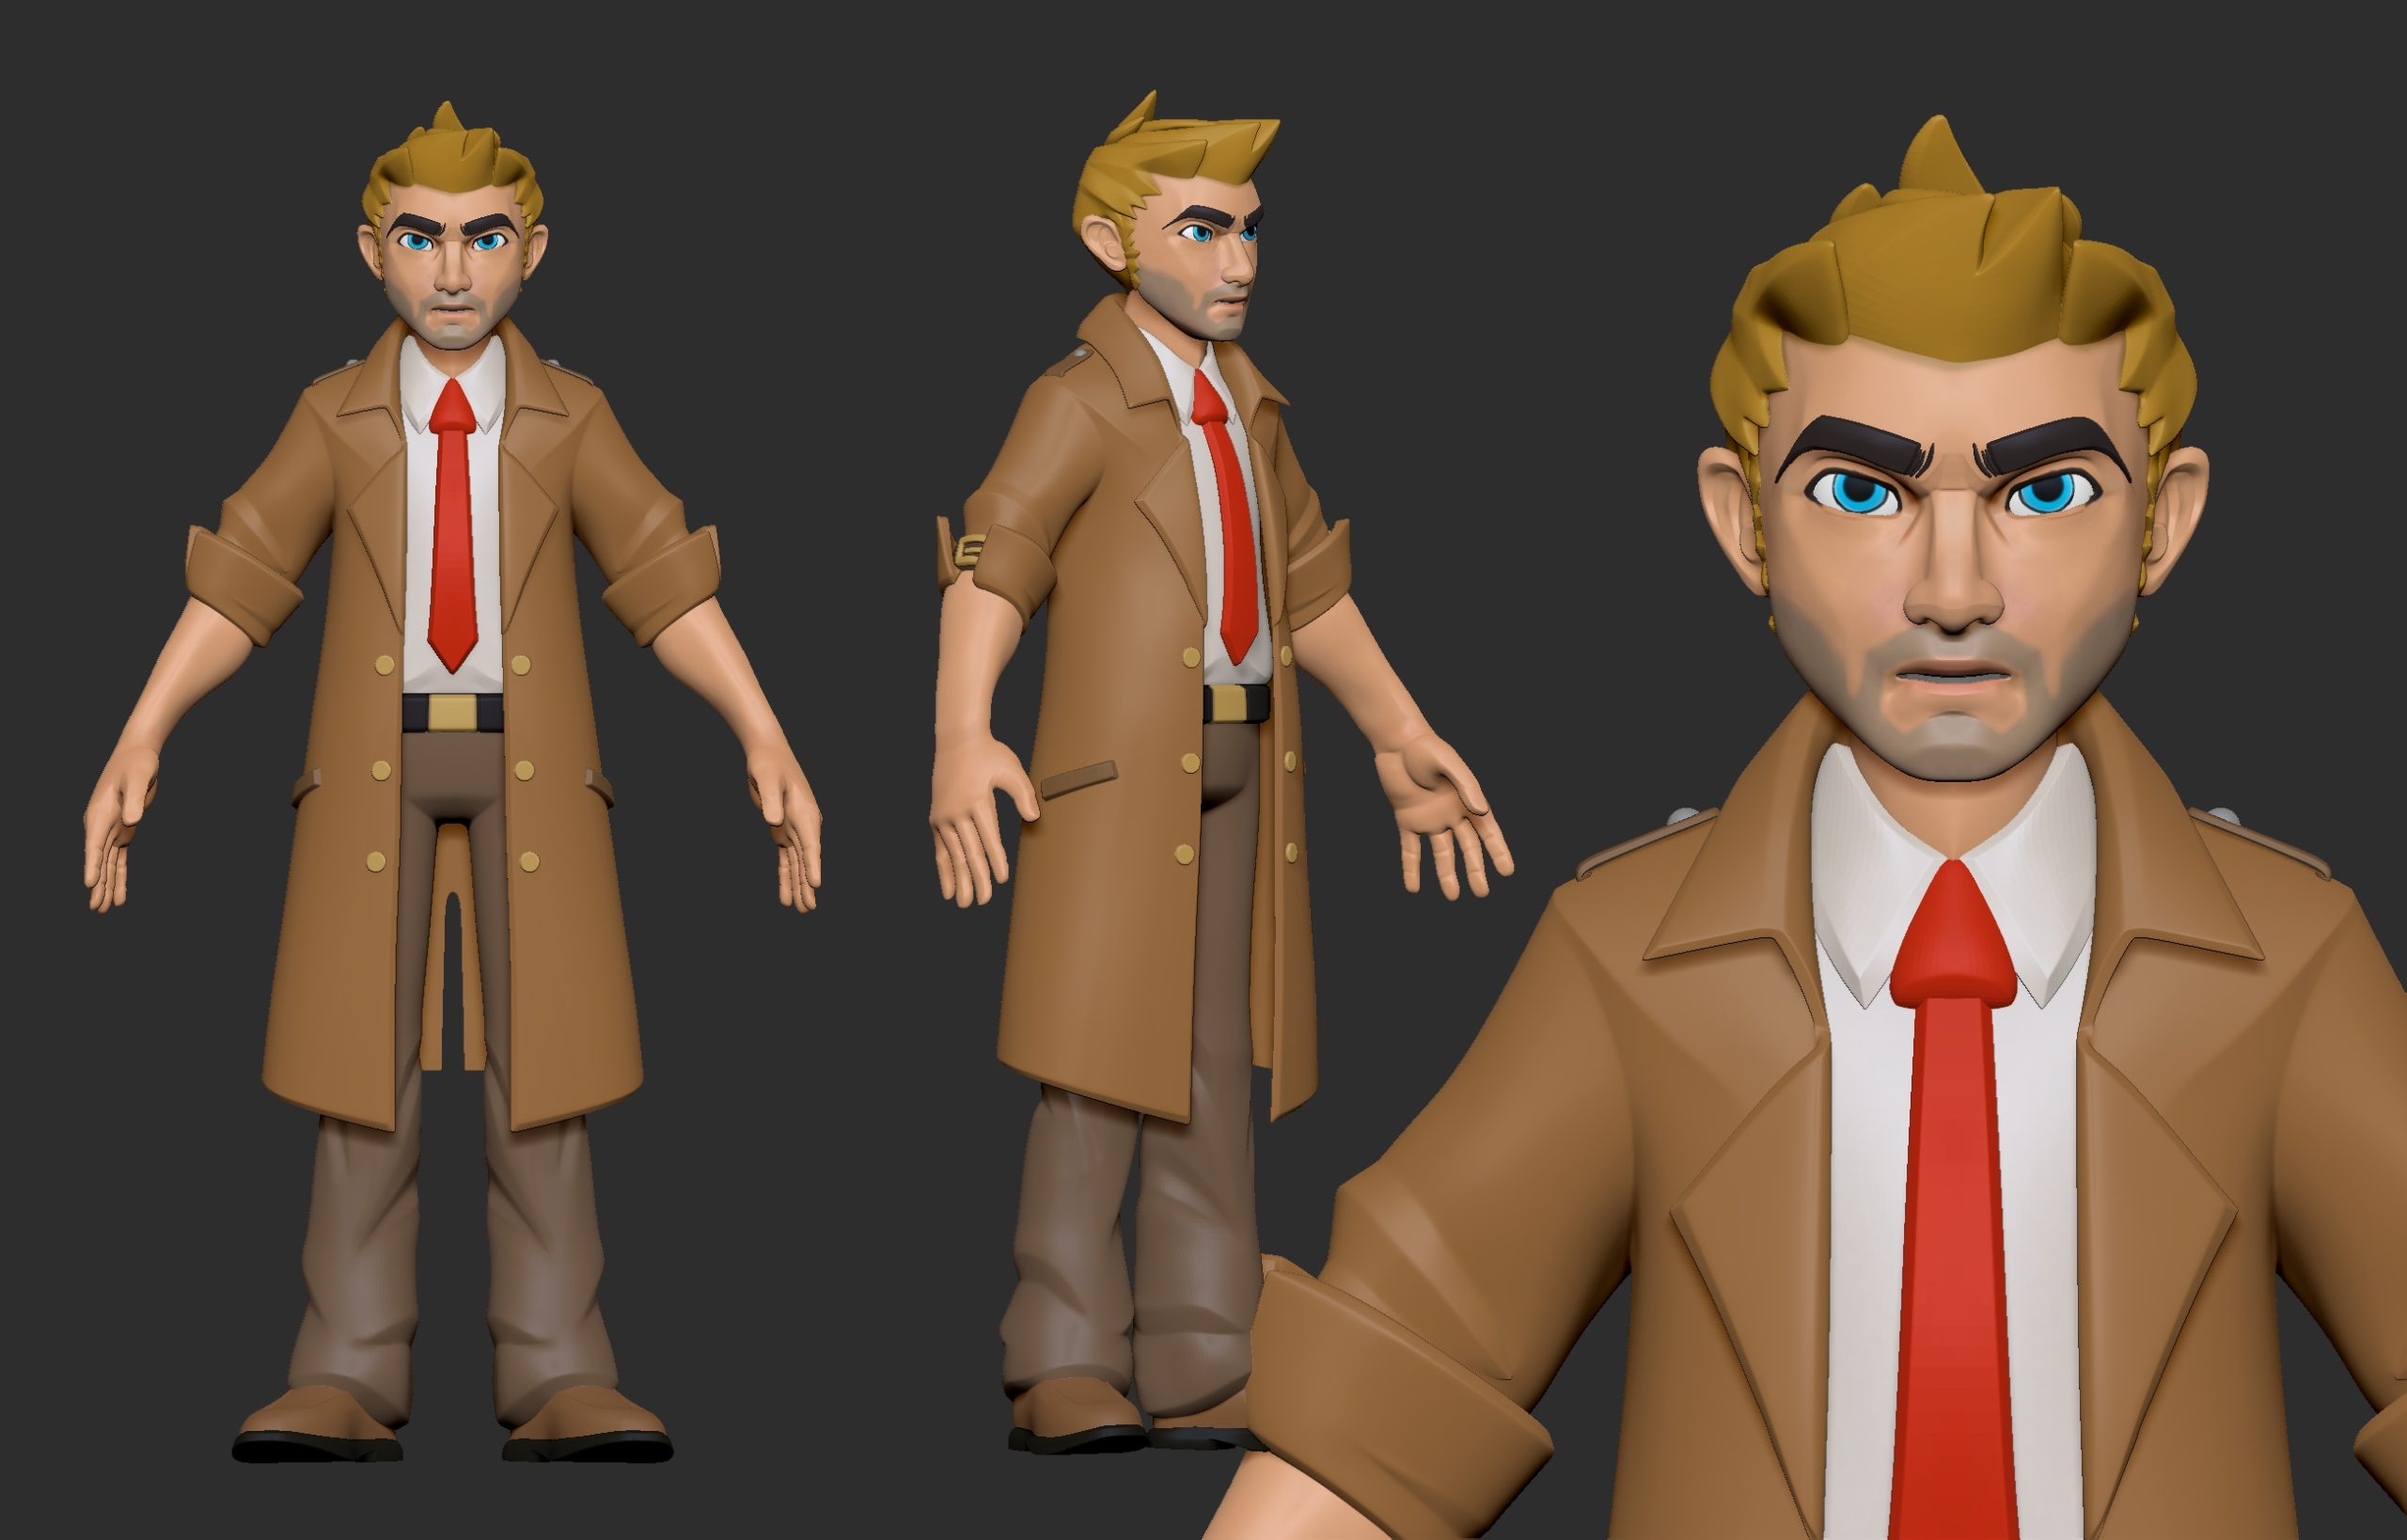
The complete high-poly sculpt of Constantine; I kept his mouth open to ease the baking process.
Texturing
I won't delve into every layer of my textures. Instead, I'll emphasize the importance of grayscale in stylized characters. In Substance Painter, you can easily access this feature by clicking on the Display Settings icon, enabling post effects, and accessing color correction. Set the saturation slider to 0, allowing you to consistently monitor your values while creating the texture.
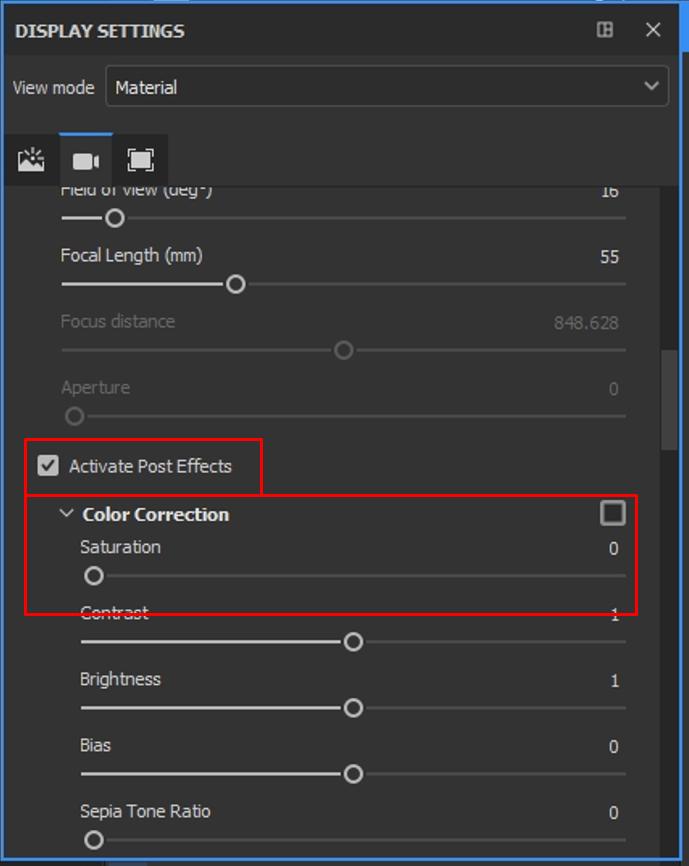
How I check my grayscale values in Substance Painter.
In my endeavor to emulate Constantine within the context of an existing game, I thoroughly examined grayscale and color variations. This involved capturing screenshots of my character and creating mockups in Photoshop using screenshots from the game.
Many games offer media kits available for download on their websites, which provided me with additional resources for testing Constantine in various scenarios. This process was instrumental in evaluating how effectively my character matched the color values of the game.
Furthermore, I highly recommend studying texture references directly from the game itself. Analyze how skin textures are painted, observe the colors of materials like leather, and note any presence of color gradients on characters. These insights can greatly inform your own character design process.


Rigging Before Posing Character
To begin, I imported my FBX character into CC4. When rigging, I selectively choose the parts that I wanted to be influenced by the bones. Therefore, elements such as hair, eyes, and teeth were temporarily hidden.
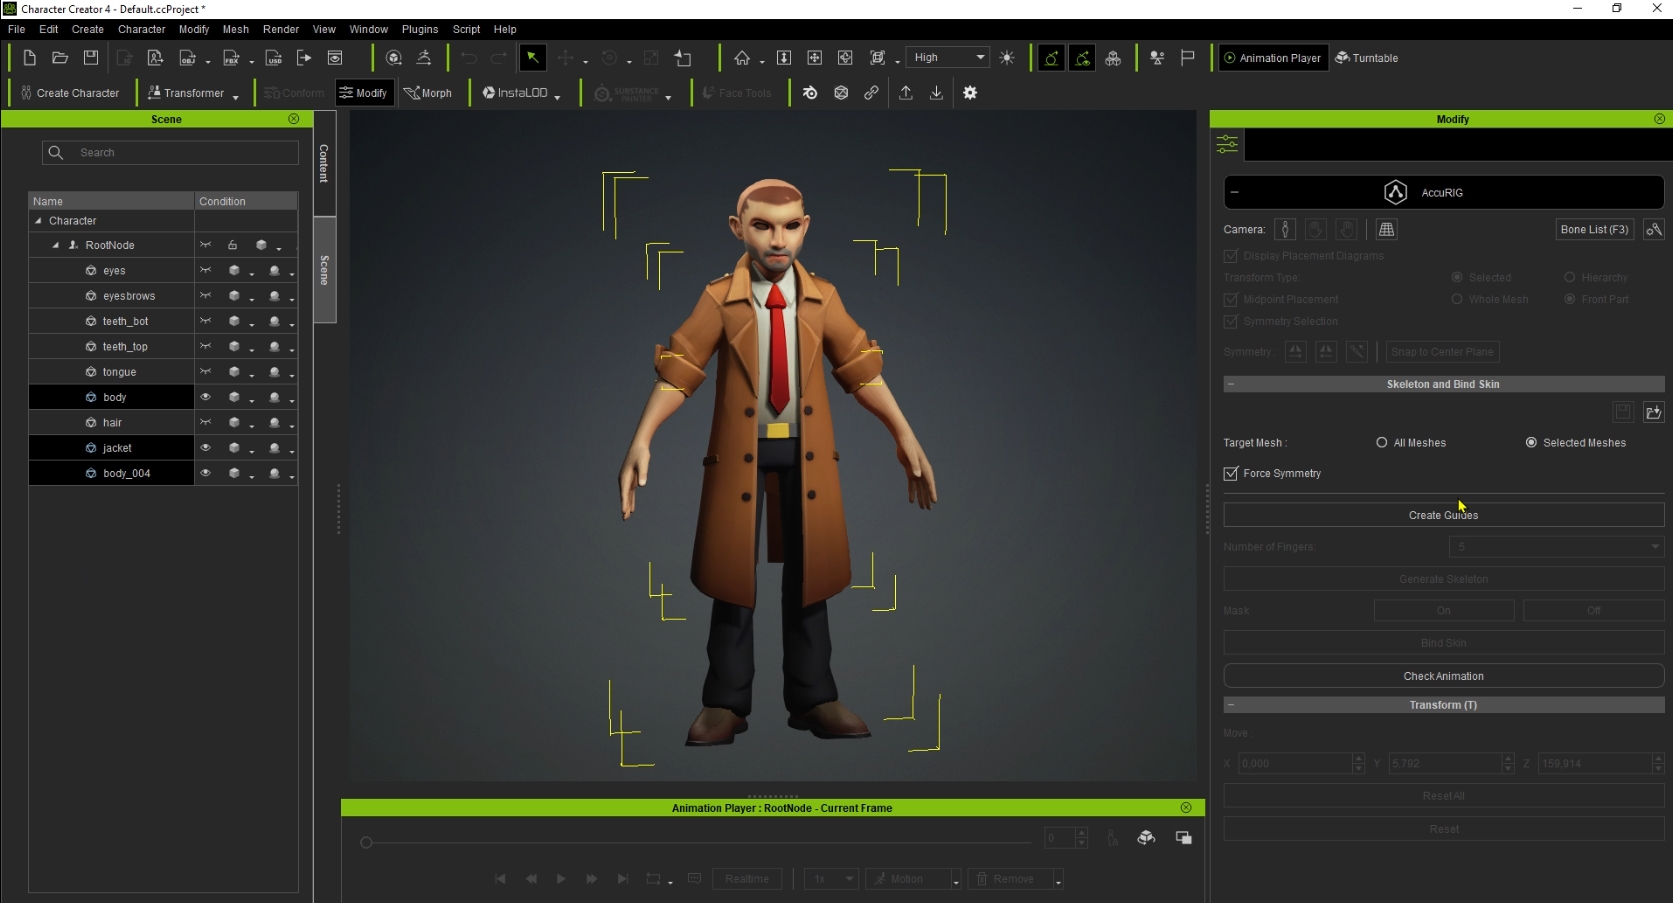
This is the character minus the unweighted parts and accessories.
Immediately, you can recognize the power of rigging in CC4. The AccuRIG grants you the ability to edit every aspect and provides image references before you press the auto-generate button. As someone not well-versed in professional rigging, this feature saved me from a lot of headaches.
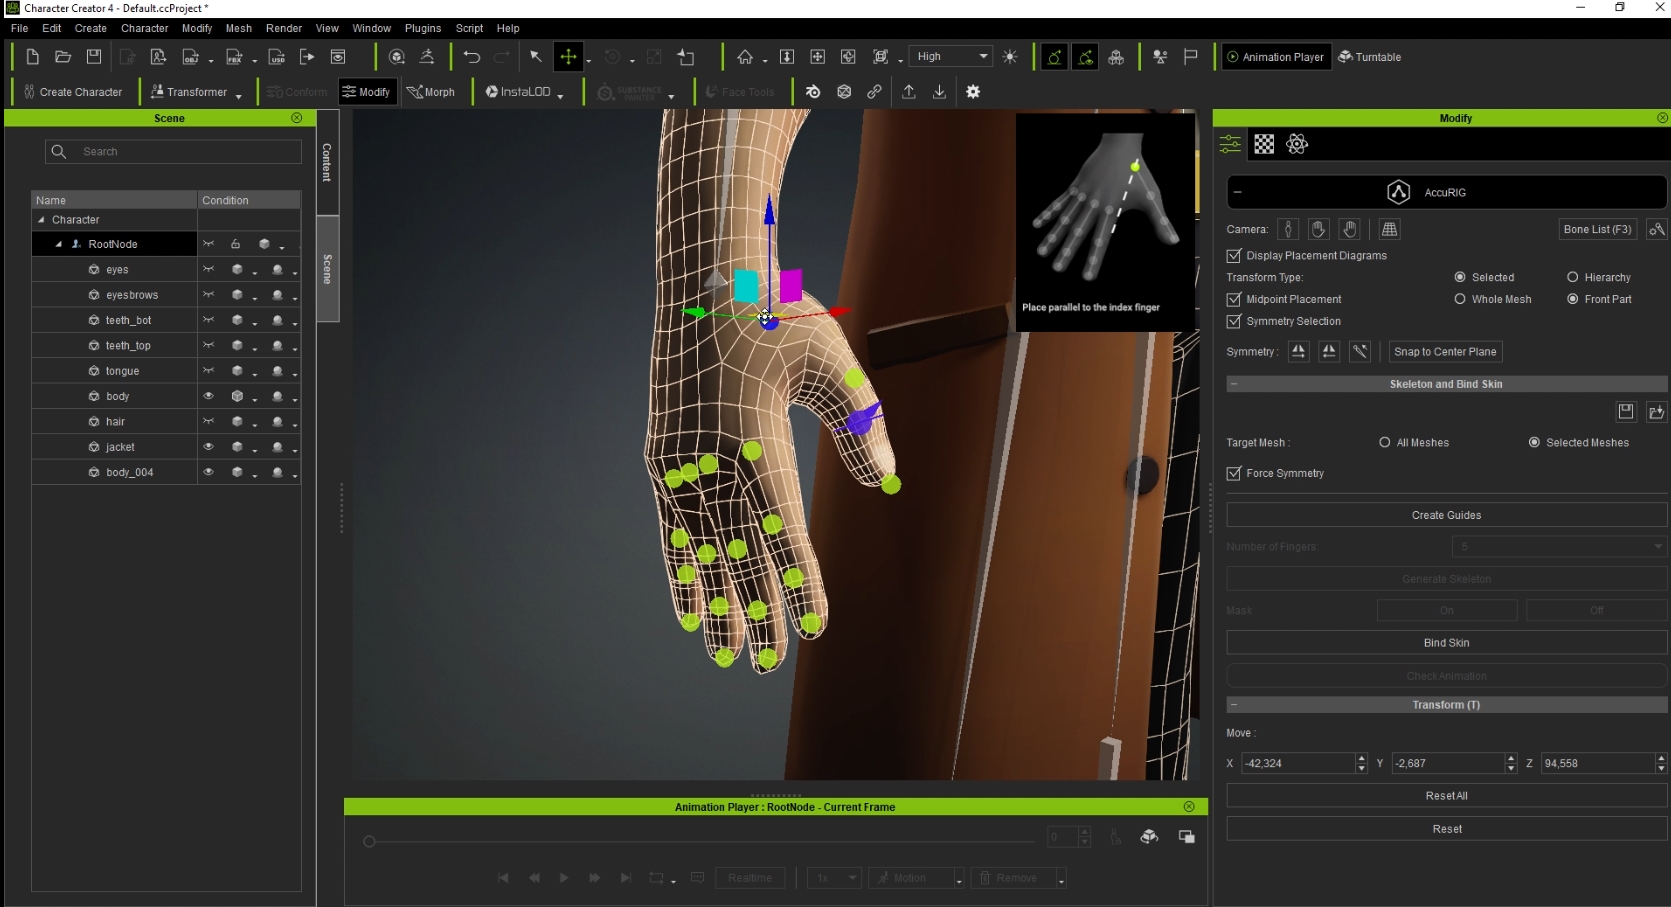
A screenshot of the auto-rigging process.
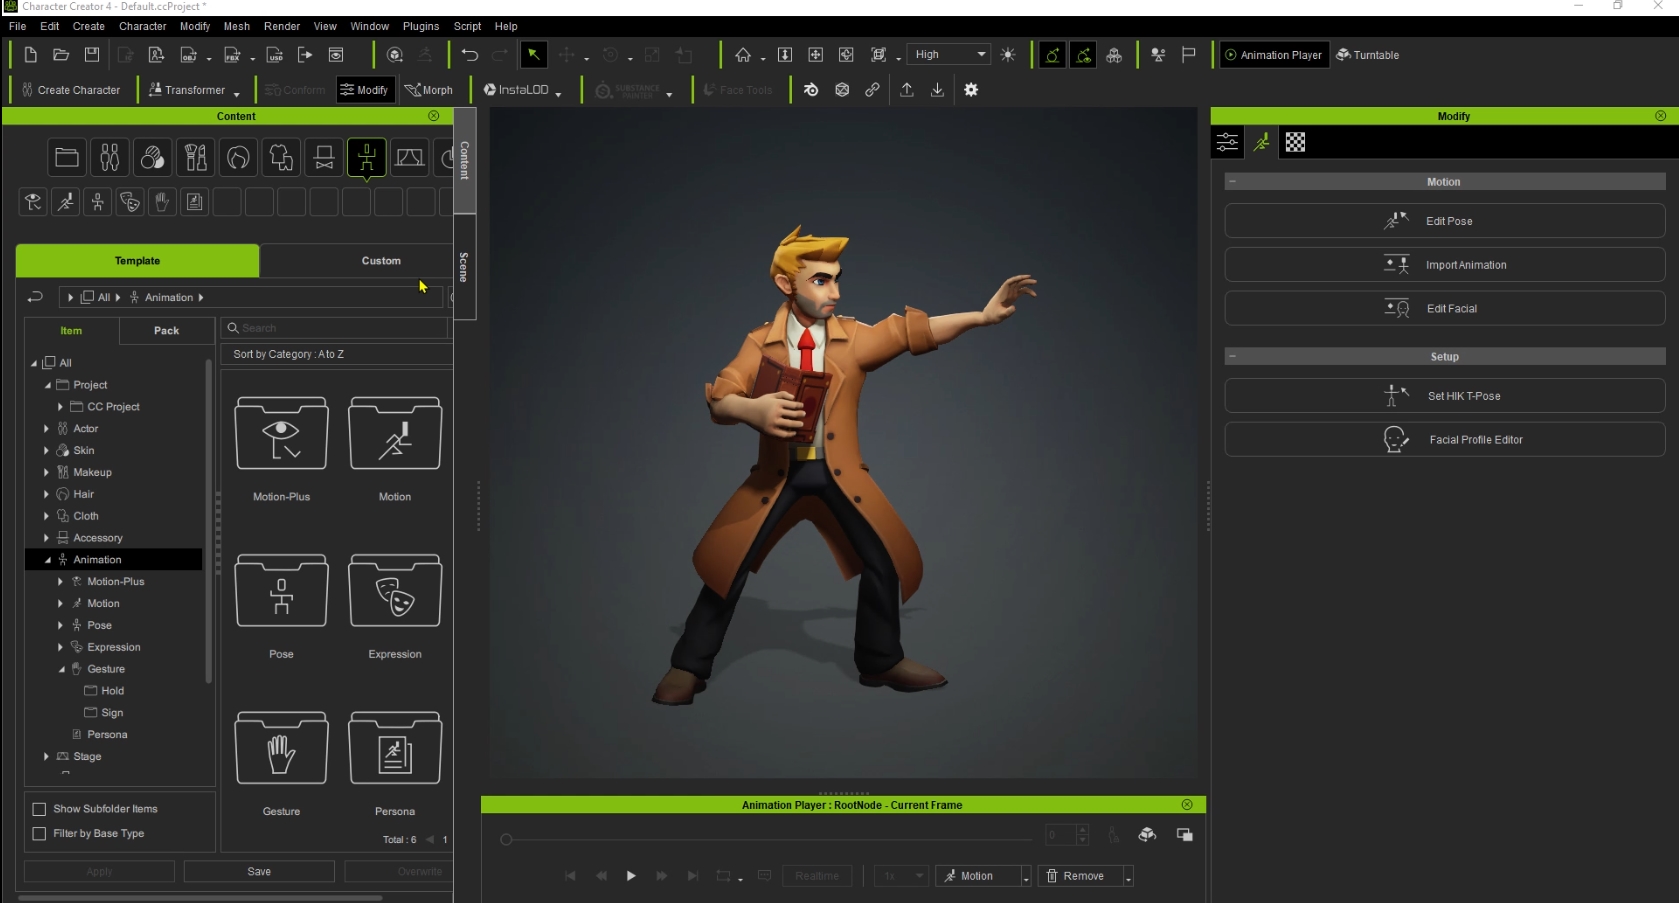
After auto-rigging, there are plenty of animations you can use to test your character and ensure everything is working correctly.
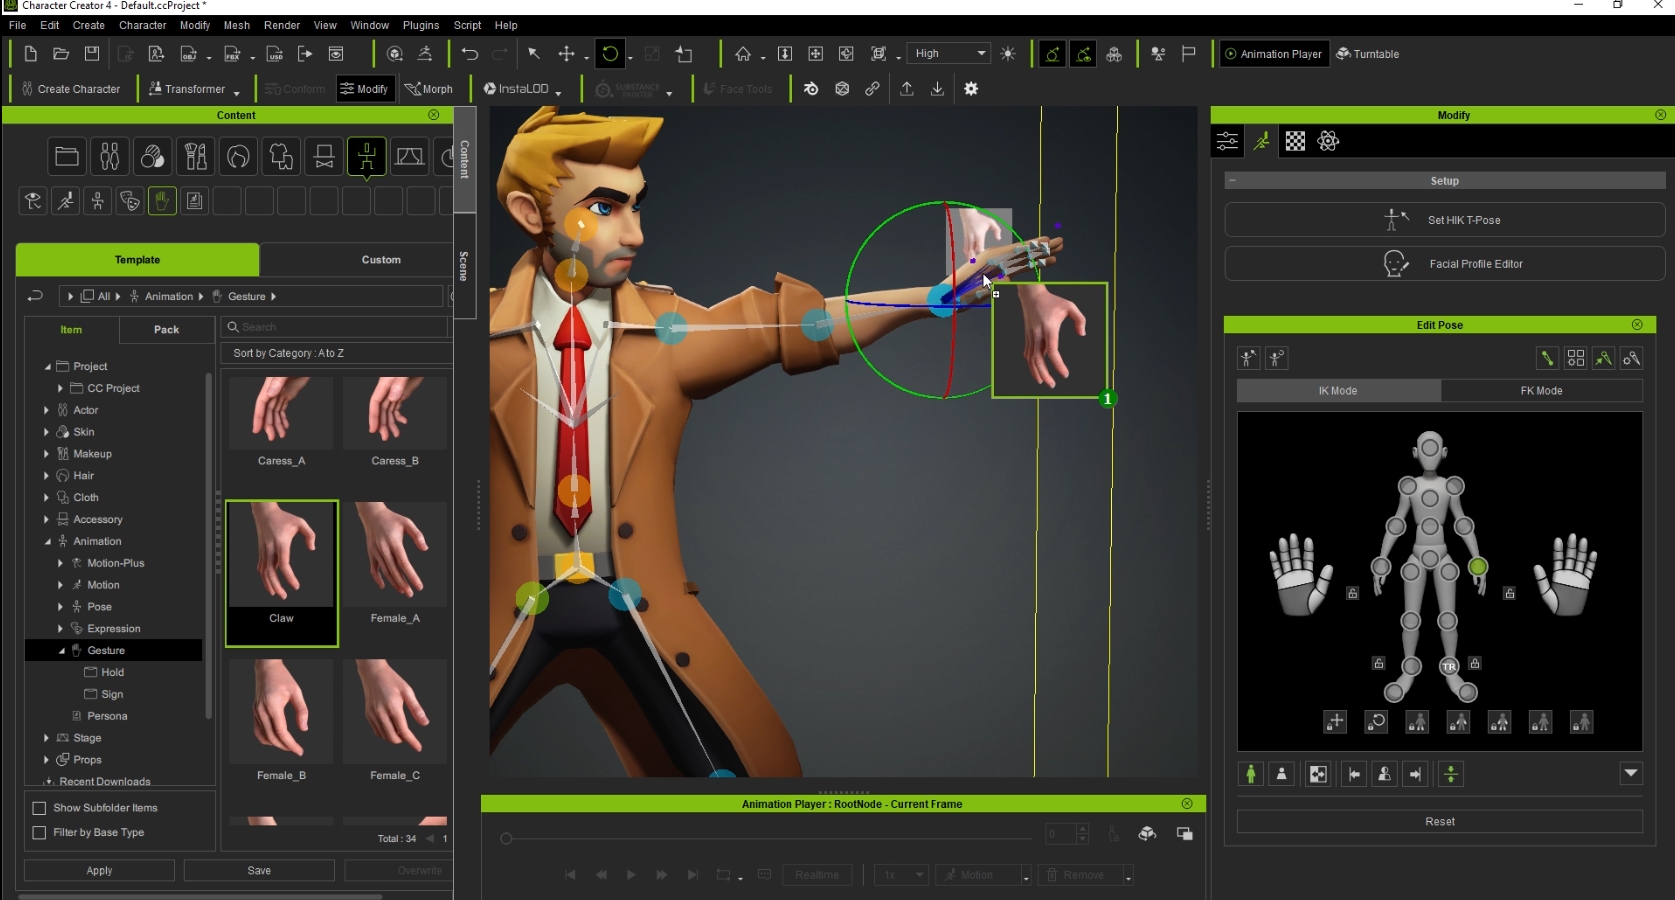
Posing Characters in Character Creator
In this article, I utilized one of the moves that Francisco drew. You can either start posing from scratch, as I did, or use an animation and pause at a suitable keyframe to begin from there.
Posing the character inside CC4.
One of my favorite features of CC4 is the ability to apply presets of hand gestures. This feature saves a ton of guesswork and prevents your character's hands from looking broken.
Simply click, drag, and paste the hand gesture you want to apply. Additionally, the hands controllers on the right side of the screen are game-changing. You can click, hold, and drag the palm of the hand to open or close it. It almost feels like cheating because of how effective this feature is for posing your character
Applying hand presets onto the character.
Another fantastic feature of CC4 is the ability to save your poses as presets. This means that I've saved previous poses, and if I wanted, I could easily revert to them and make adjustments. All you have to do is save the pose, and then double-click to apply it to your characters. This functionality adds a layer of flexibility and convenience to the posing process in CC4.
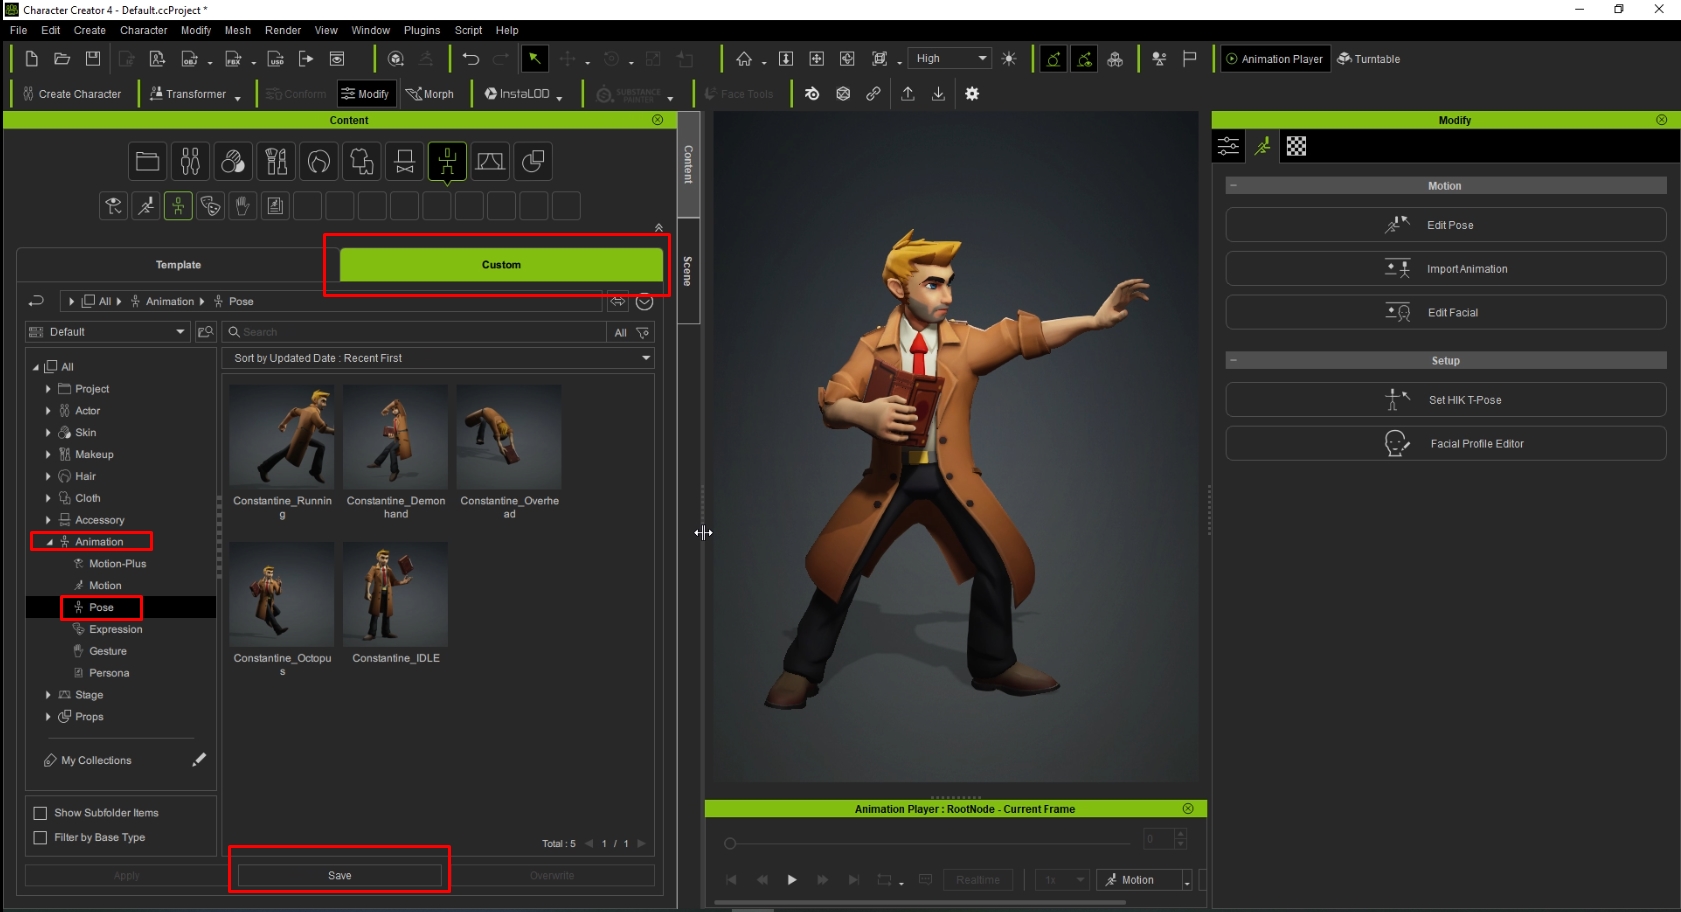
Making preset poses inside CC4.
These poses can be applied to other characters too. The presets are compatible with characters from CC4, allowing you to create poses, save them as presets, and apply them to your characters later on. This flexibility enhances the usability of the poses and streamlines the posing process for various character designs.
Refining Poses in Blender
After achieving a satisfactory auto rigging and initial pose, I imported my model back into Blender to start refining it. First, I painted out some weight influences from bones that I didn't want affecting certain areas, like the head, and then adjusted the arms slightly.
Creating a character that interacts with a prop is always a challenge, so I spent extra time refining the angles of the book and the hands. Integrating CC4 into my pipeline proved to be worth it, as it streamlined the process. We've all seen beautiful artwork pieces in artist portfolios that are only shown in T or A poses, often because posing characters can be daunting and time-consuming. With CC4, I found it much easier to achieve dynamic poses.
For the clothes, I used sculpting brushes in Blender. The main brushes I used were Grab, Smooth, Pose, and Mask. I separated small objects like buttons and the tie to prevent distortion but ended up stretching the buttons slightly to add a dynamic feel to the gesture.
It's important to view your character from all angles, but I focused primarily on the angle that Constantine would be viewed from in a 3D fighting game.
Conclusion

This wraps up my overview of creating this character. I want to extend my gratitude to Reallusion for recognizing my work and providing me with the opportunity to showcase my workflow with CC4.
A special thanks goes to Michael Pavlovich for his outstanding tutorial videos on how to use CC4. They were incredibly helpful and made the final steps.
Thank you for stopping by, if you are interested in the full making process of comic characters, please explore the original post for more details.