
INTRODUCTION
Hi, I’m Arati Puranik, or @rteaarts on most platforms. I’m a 3D artist from Maharashtra, India. I’m currently an art director in an indie studio.
Before 2019, I was pursuing a career in clinical psychology, having already earned my masters and teaching psychology in a college. Then, I made a drastic career shift and decided to go for a Diploma in Game Art and Design. Since then, I also took a lot of courses online to further upskill myself (Wingfox is a lifesaver!).
I love storytelling through environments, and I really love creating cozy scenes. I would love to work on highly detailed, visually stunning environments that tell their own stories. I consider myself a realism artist, but I like to explore NPR art styles frequently. Currently, I am in the initial stages of working on my first short film.
INSPIRATION
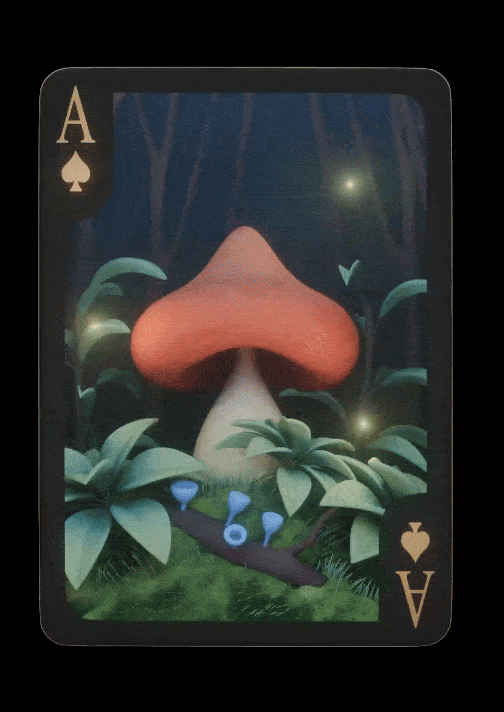
I’ve always really loved custom playing cards, some of my favourite artists have their own decks that I wish to buy some day. So when I first saw Blender’s new Ray Portal Shader, the first thing that came to mind was a playing card.
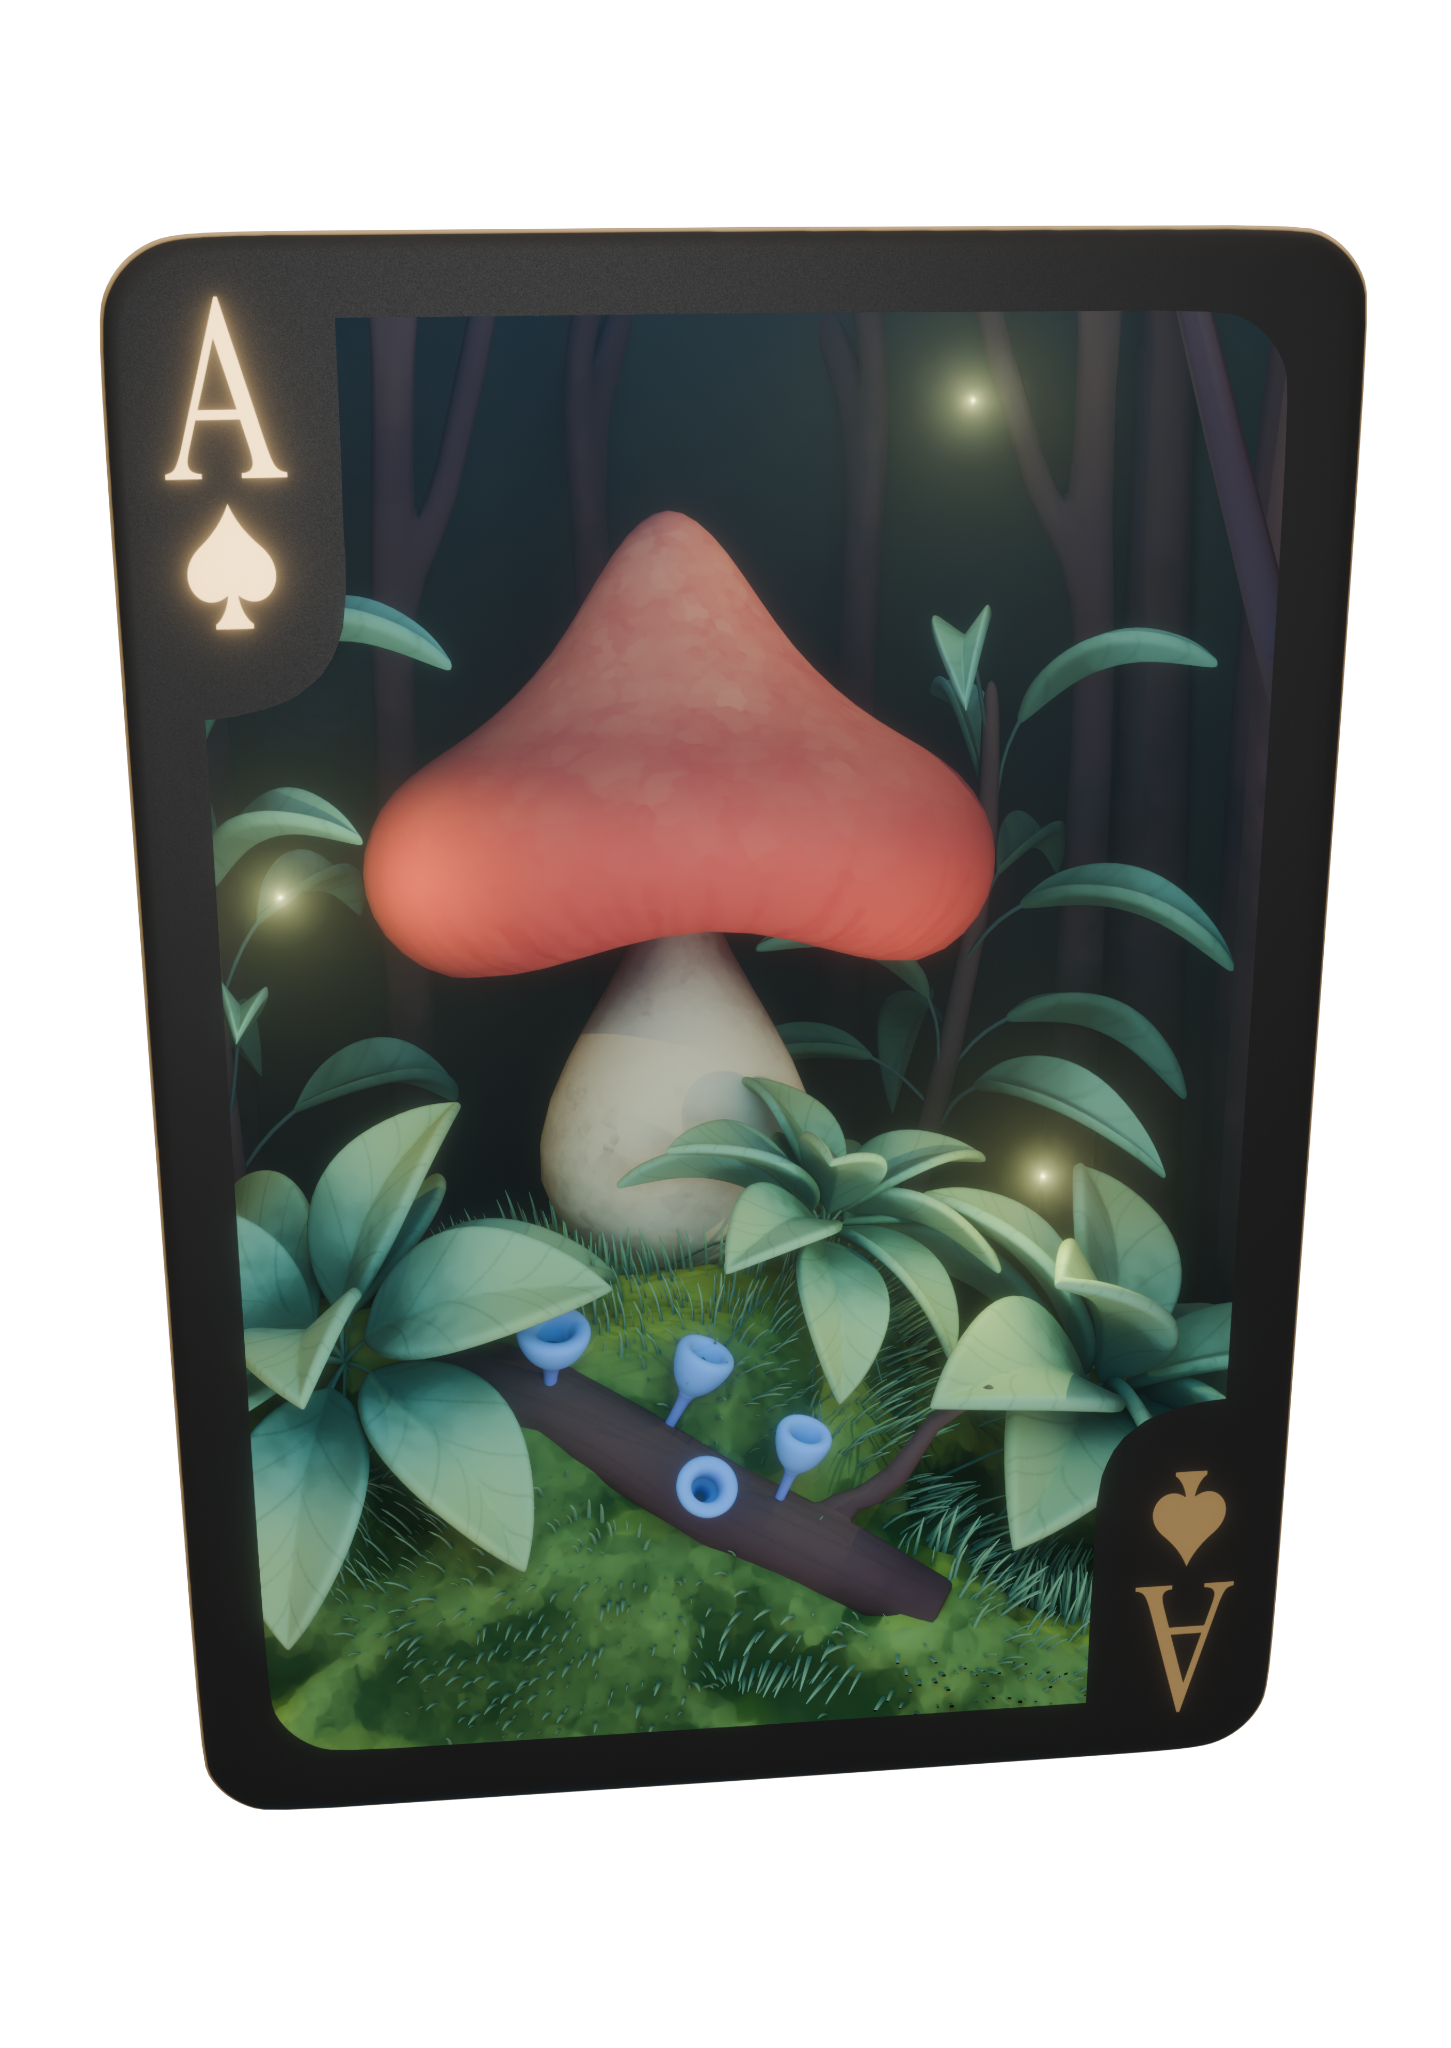
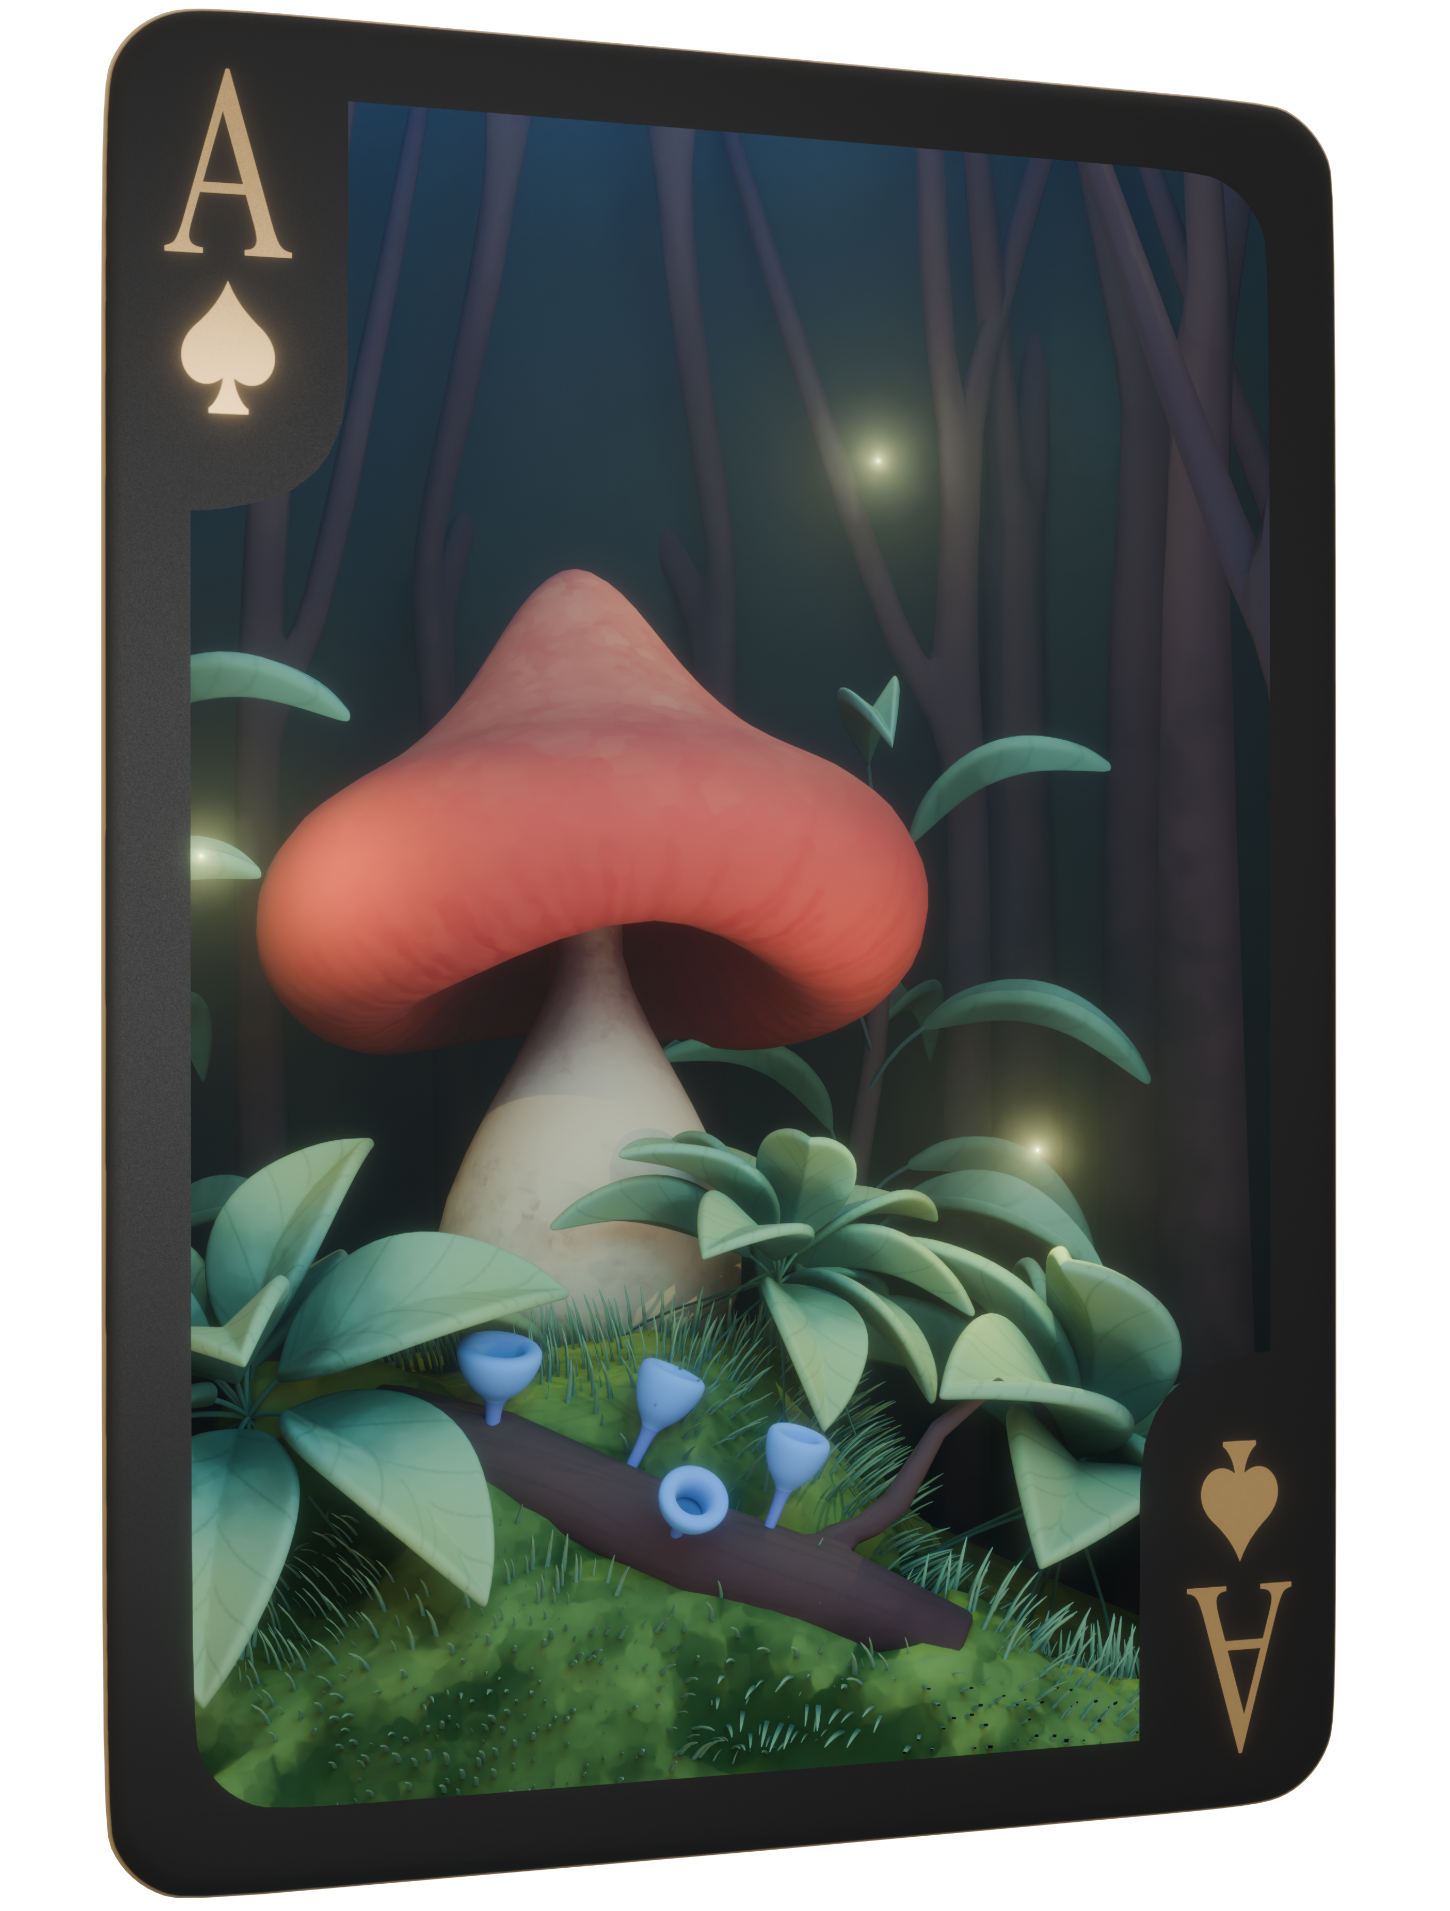
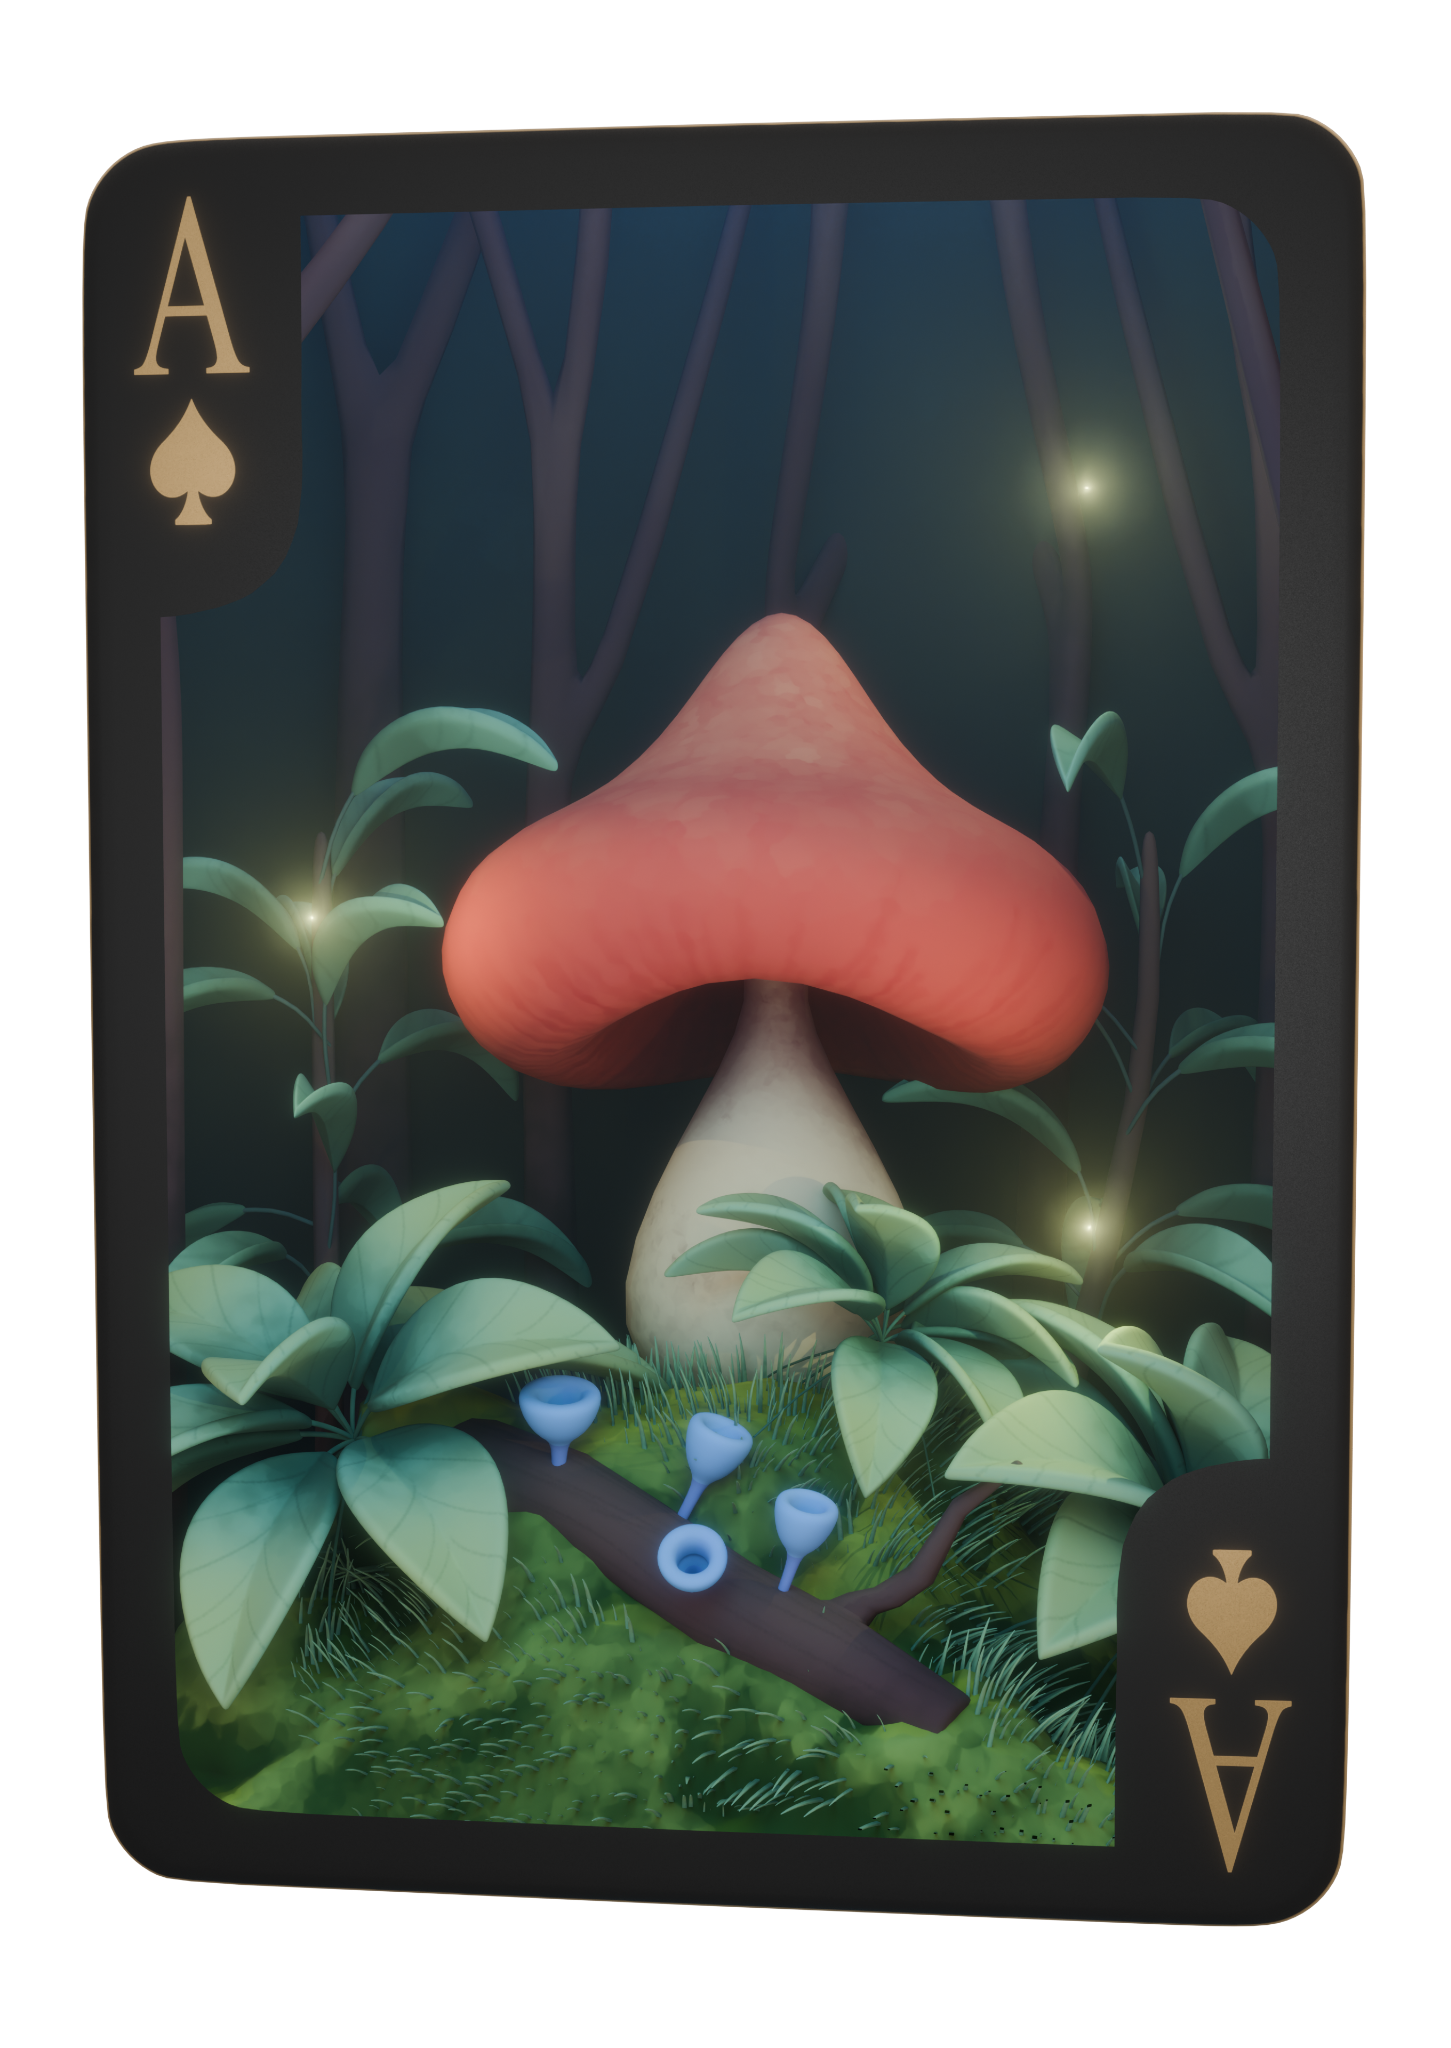
I chose Ace of Spades for this because I think spades kind of look like mushrooms, and I thought creating a mystical mushroom forest would look quite good for this piece.
PROCESS
Software:
- Blender
- Substance 3D Painter
Block-Out:
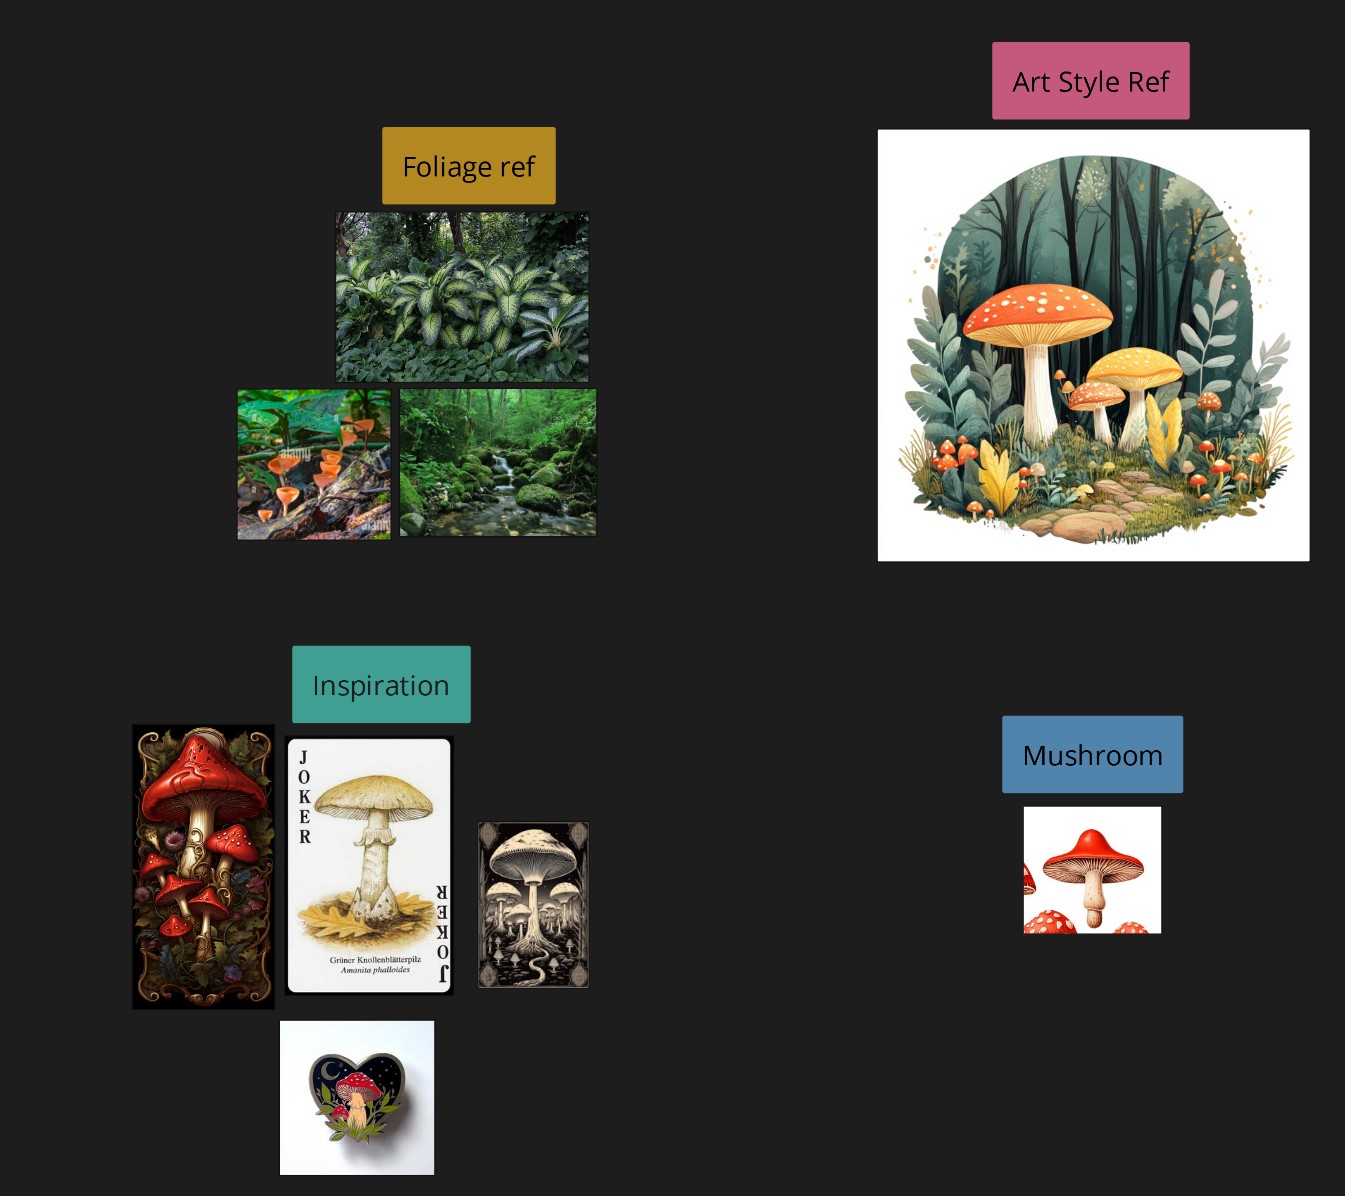
I knew I wanted to create something that looked like a mystical forest with a mushroom in the center, so I started by gathering references online. I primarily searched on Pinterest and Google Images with specific keywords, but I also looked for some references on Artstation.
I gathered references for composition as well as art style references.
Once I had set up the ray portal shader (I followed Default Cube’s tutorial for this on YouTube), I started trying to figure out the scale of my scene.
I knew I wanted it to feel like a place that was contained within the playing card, something that you take with you, and not like the card was just a doorway into a whole other world. I think this stage took the longest, with me experimenting with various different sizes and shapes of the room that this forest was going to be in, but finally I settled on this.

Modelling:
Once I had the size of my scene set, I got to work on the mushroom. Since this is a playing card, and the mushroom was going to be my Ace of Spades, it was important that I got the shape and placement right. I also quickly created the outer shell of the playing card. This was required because the ray portal shader is double sided.

When I had all of the main elements in place, it was time to add the environment. I created a flat plane, gave it a bunch of subdivisions and sculpted the ground so the mushroom was sitting on the ground instead of floating in air, and then I added trees in the background. I wanted the trees to give that mystical yet stylized look so I made the trees fairly thin.

Now, with all of the structural elements set up, I just had to add foliage. I created a couple of different types of plants.

At this point, it looked pretty good but it was missing something. So, I decided to add a log and some different types of mushrooms, plus some grass to the ground.

Texturing:
At this point I was pretty happy with the composition, so I separated all the elements and exported them for texturing in Substance Painter. I initially wanted to give it a watercolour texture but I felt this scene would look better with simpler textures. I kept the textures simple, mostly making use of position gradients and slope blur, and painted darker lines wherever needed.
I textured the card using multiple different alphas that come with Substance Painter. This is what the textured result ended up looking like.


Lighting:
Lighting for this was pretty simple. Once the scene was all set up, I added some volumetric fog and a light that shines directly onto the scene. I also wanted it to look like moonlight was shining in through the top, so I added a bit of an exaggerated blue light coming in from the top. At this point, it still felt like the render could use a little more flare, so I just added a few yellow point lights to make them look like fireflies. I also added a light that was pointed directly to the card to highlight the metallic elements of the card.
Animation & Rendering:
I parented the card to an empty and animated the empty to best capture the feeling of this portal, and then it was time to render.
And that was it! Below are the final renders.
RENDER: Ace of Spades
That’s all! Thank you for reading!
About the Artist
Arati Puranik is a 3D Artist from India. She is currently working as an art director in an indie studio and is open to freelance jobs.