")
Explore as Isaac, a 3D character artist and founder of Yelzkizi, brings the character 'Alora' to life in his unique style.
INTRODUCTION
Hi! My name is Isaac, and I’m a 3D character artist specializing in character creation using Blender. As the founder of Yelzkizi and the creator behind PixelHair, my work isn’t just about making 3D characters—it’s about providing narratives that make them believable and relatable. I’m also dedicated to supporting other artists by sharing high-quality 3D assets and resources, such as this article, to help them achieve the same.
In this article, I will show you how I created the character "Alora." Alora is an albino character and a new addition to the roster for an upcoming project called "Virtual Personalities." By sharing my creative process behind this character and render, I hope to offer valuable insights and inspire fellow artists to explore new techniques and ideas.
INSPIRATION
The idea for this character is a mix of multiple inspirations. For Alora, I wanted to create a character with more diversity than the typical 3D characters you see online. A Black albino character felt like the perfect fit for this goal.
As for her body type, I chose something not commonly seen in 3D characters. Instead of the typical slim or muscular figures, I opted for the body of an average woman in her 30s—someone you might see at the grocery store or as a neighbor. This makes the character more relatable to everyday life.
The inspiration for her dress and jewelry came from Pinterest. I was looking for something classy with a bit of vintage flair, suitable for a formal event. After extensive searching, I finally settled on the dress you see below.
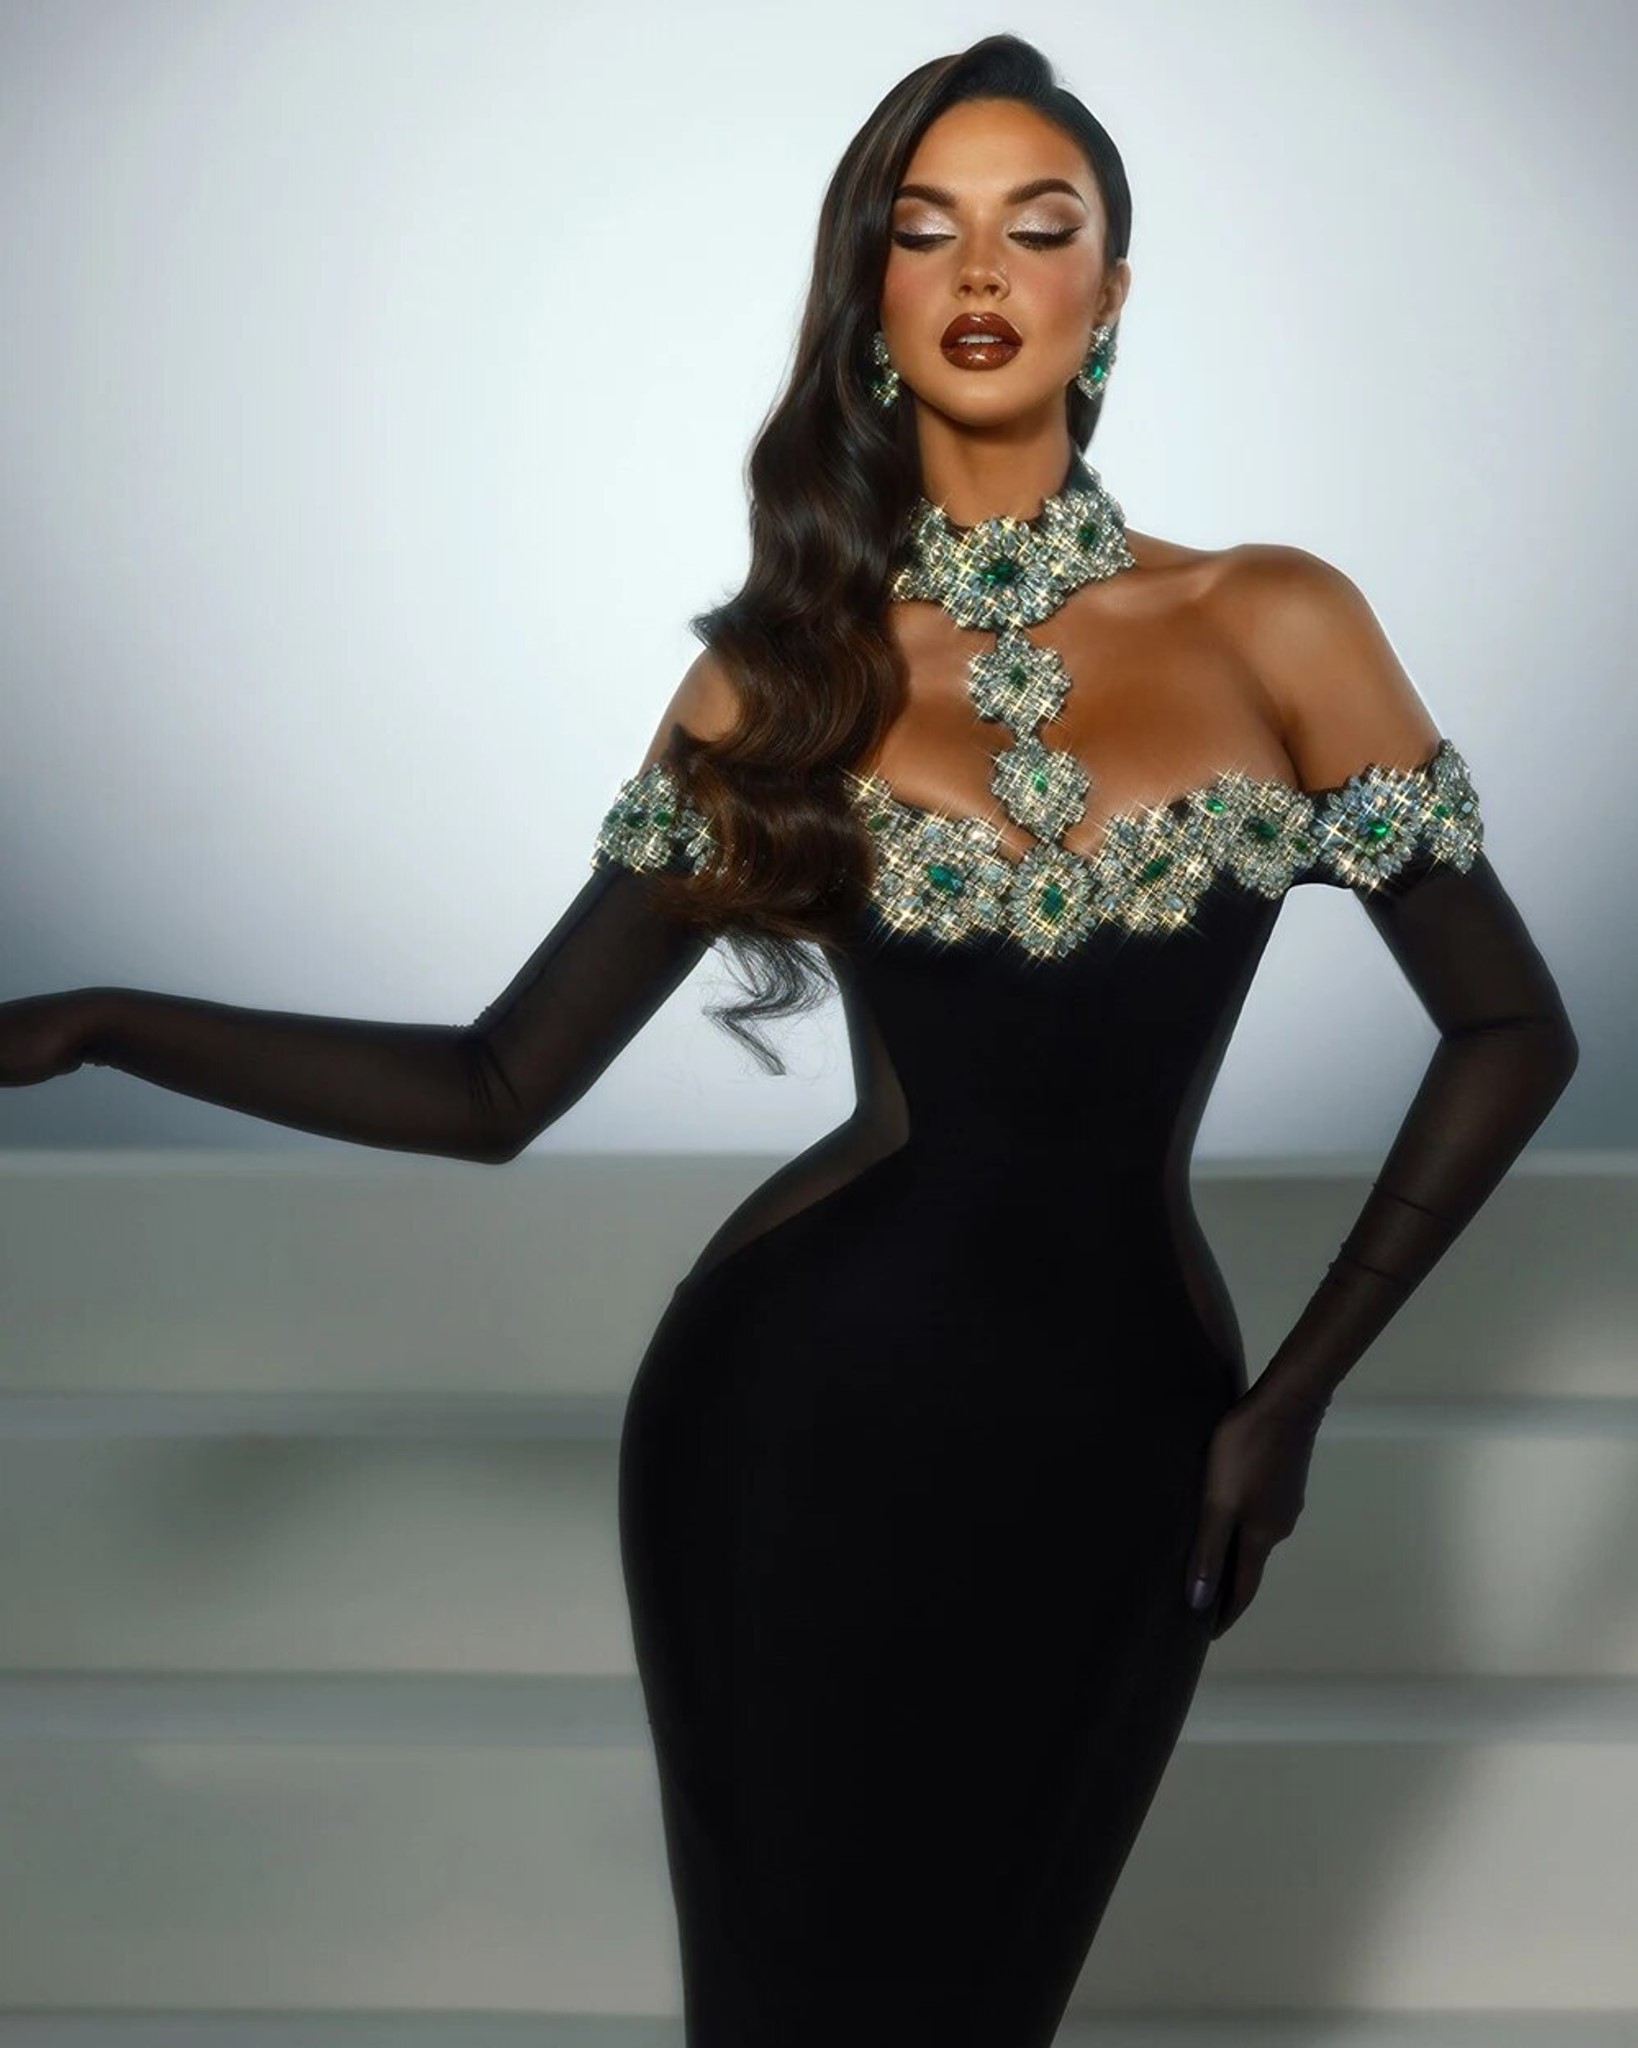
I always knew I wanted the dress to highlight her neck, which I consider an attractive feature. That’s why, when I found a dress on Pinterest, I modified it by removing the neck area and adding a single diamond necklace to draw attention. The choice of necklace was intentional, guiding the viewer's eyes from her neck down to her body and the champagne glass.
The scene, pose, and lighting were inspired by a photoshoot for the hit show Peaky Blinders. One character in the show, Polly Gray, played by the late Helen McCrory, had the exact aura I was aiming for. I found images on Pinterest, and the lighting and overall atmosphere matched my vision perfectly.

With the image of Polly Gray as a reference, everything became clearer. I used that as the main focal point while gathering references for the smaller details.
Even though Polly Gray's image served as a great reference, I felt that adding a masquerade mask would make her eyes stand out even more. This addition would give her the piercing gaze that matches the overall vibe I’m aiming for. To find inspiration for the mask, I turned to Pinterest, where I discovered a design that complemented both her dress and the overall aesthetic perfectly.

Just like her necklace, other pieces of jewelry, lighting, and scene elements were carefully selected to direct the viewer’s attention to specific areas. The key focal points form an "S" shape, starting with the light on her face from the window and flowing down to the silhouette behind her. This approach was crucial for creating balance in the render and making it visually pleasing. In the next section, I will explain how I achieved this.

PROCESS
Character Modeling
To create the character, I started with a base mesh to save time. However, I needed higher polygon density in certain areas, such as the face, so I added loop cuts to the base mesh to increase the detail. The character's UV mapping was done in Blender and laid out as UDIMs. I chose this method because it provides the highest texture resolution and flexibility for the model. The sculpting was completed in ZBrush. This entire process took a couple of months—not because it’s the norm, but because Alora also served as a learning experience for me as I developed ideas for the Virtual Personalities project.

Once I was satisfied with the sculpt, it was time to add textures. To texture Alora, I used scan data. The albedo scan data I had access to didn’t match the skin tone I envisioned, so I mixed and matched several albedo scan sources and added manual paint touch-ups. To transfer this scan data, I used Faceform’s Wrap software, which includes a baking feature for UDIMs, allowing me to easily transfer textures to my model.
After that, I brought the character into Mari, where I combined the scan data and did additional painting. Mari excels at painting, especially on maps with high texture resolution.
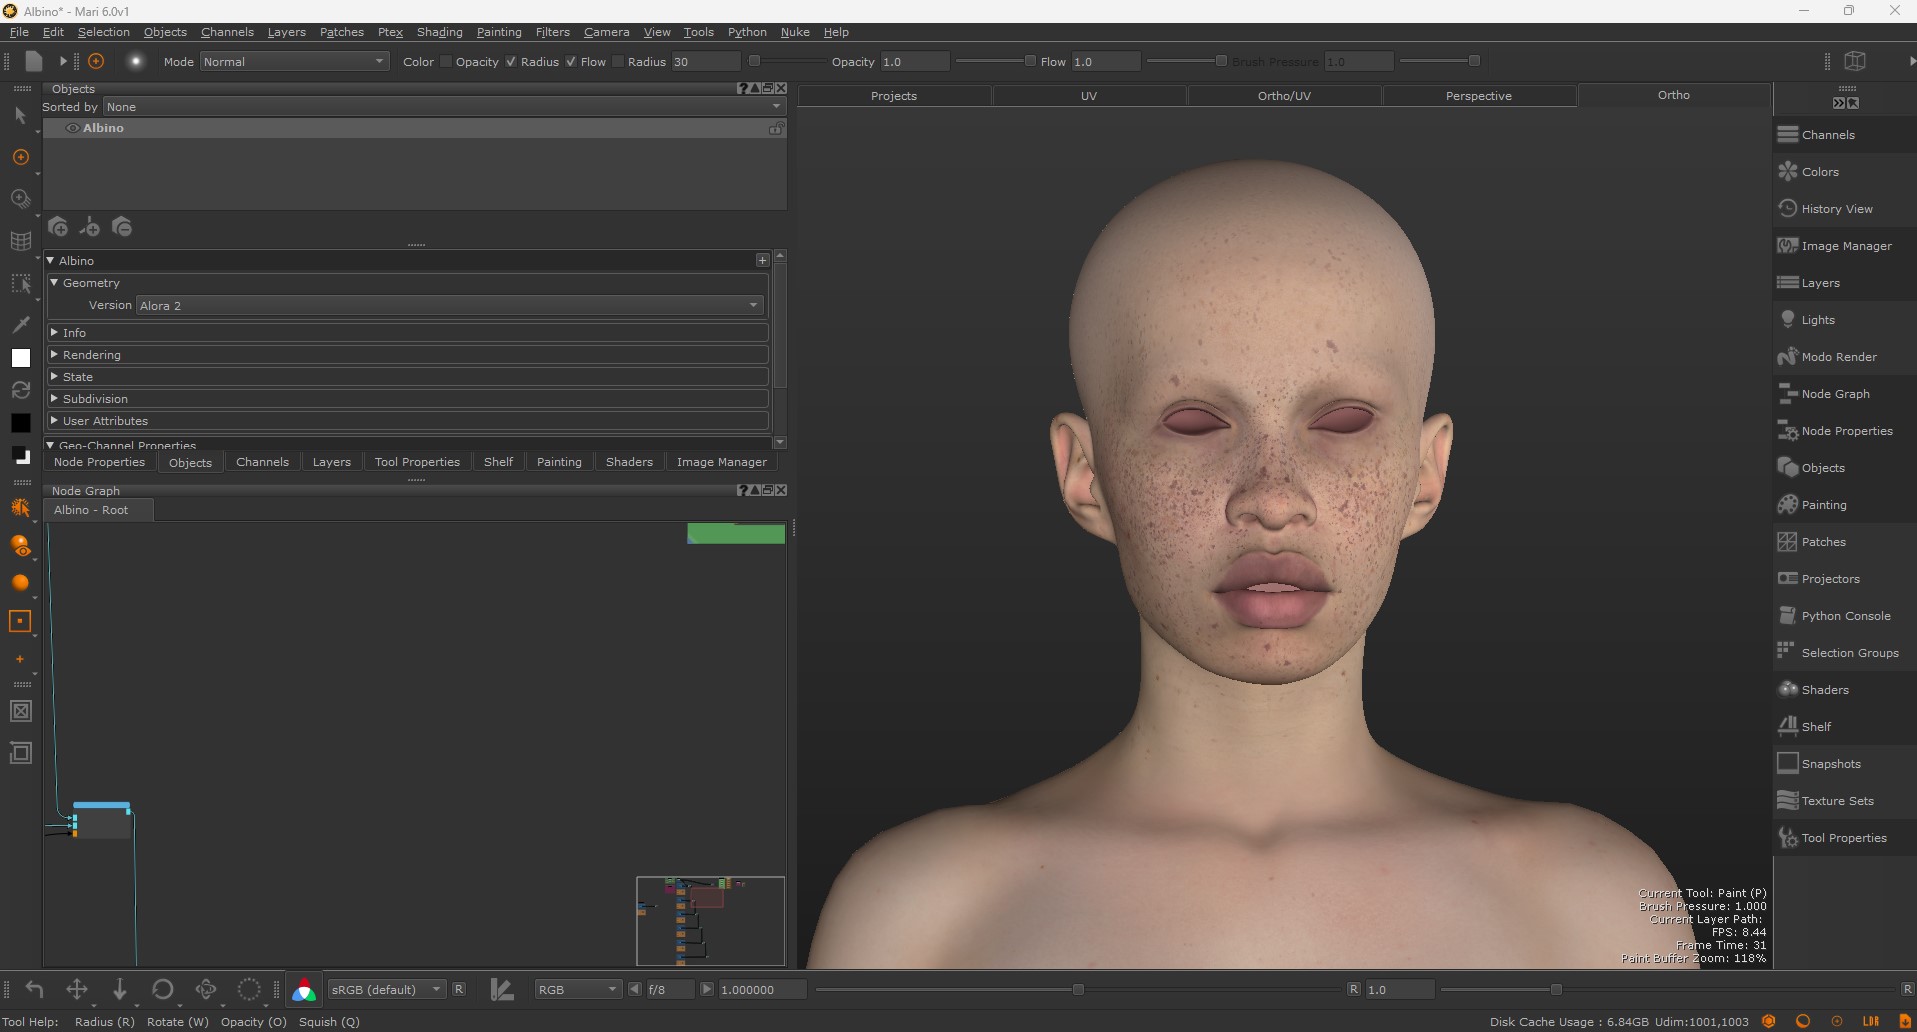
When the albedo was complete, I moved on to displacement. Before working on the displacement, I created a rough rig in Blender and posed the character, so any sculpted skin folds would be baked into the displacement. After rigging and posing the character, I used the GOB add-on in Blender to send the posed model to ZBrush for displacement work. While displacement can be done in Mari, I prefer ZBrush for this task. In ZBrush, I applied the displacement from the scans and adjusted all necessary areas. Occasionally, I imported the texture maps from Mari into ZBrush to ensure the displacement aligned with the albedo. With the model posed, I was able to sculpt the skin folds and deformations related to the pose.

With the displacement complete, I exported it and brought it into Mari to generate the roughness map for the character. I chose to use the displacement map for the roughness to add more depth and detail. After creating the roughness map, I worked on the subsurface map, again using the displacement map to blend the subsurface range with the skin details. Once all the maps were complete, I exported them from Mari, ready for look development in Blender.
Before starting the look development, I decided to create her dress and set up the scene. This approach allowed me to begin visualizing the final render and work on the scene lighting during the look development phase.
Clothes and Accessories
Making her dress was pretty straightforward. I exported the posed version of the model and brought it into Marvelous Designer. There, I created the patterns for the dress and started sewing. Since I couldn’t find the exact patterns on Pinterest, I made predictions based on what I observed in the reference images.
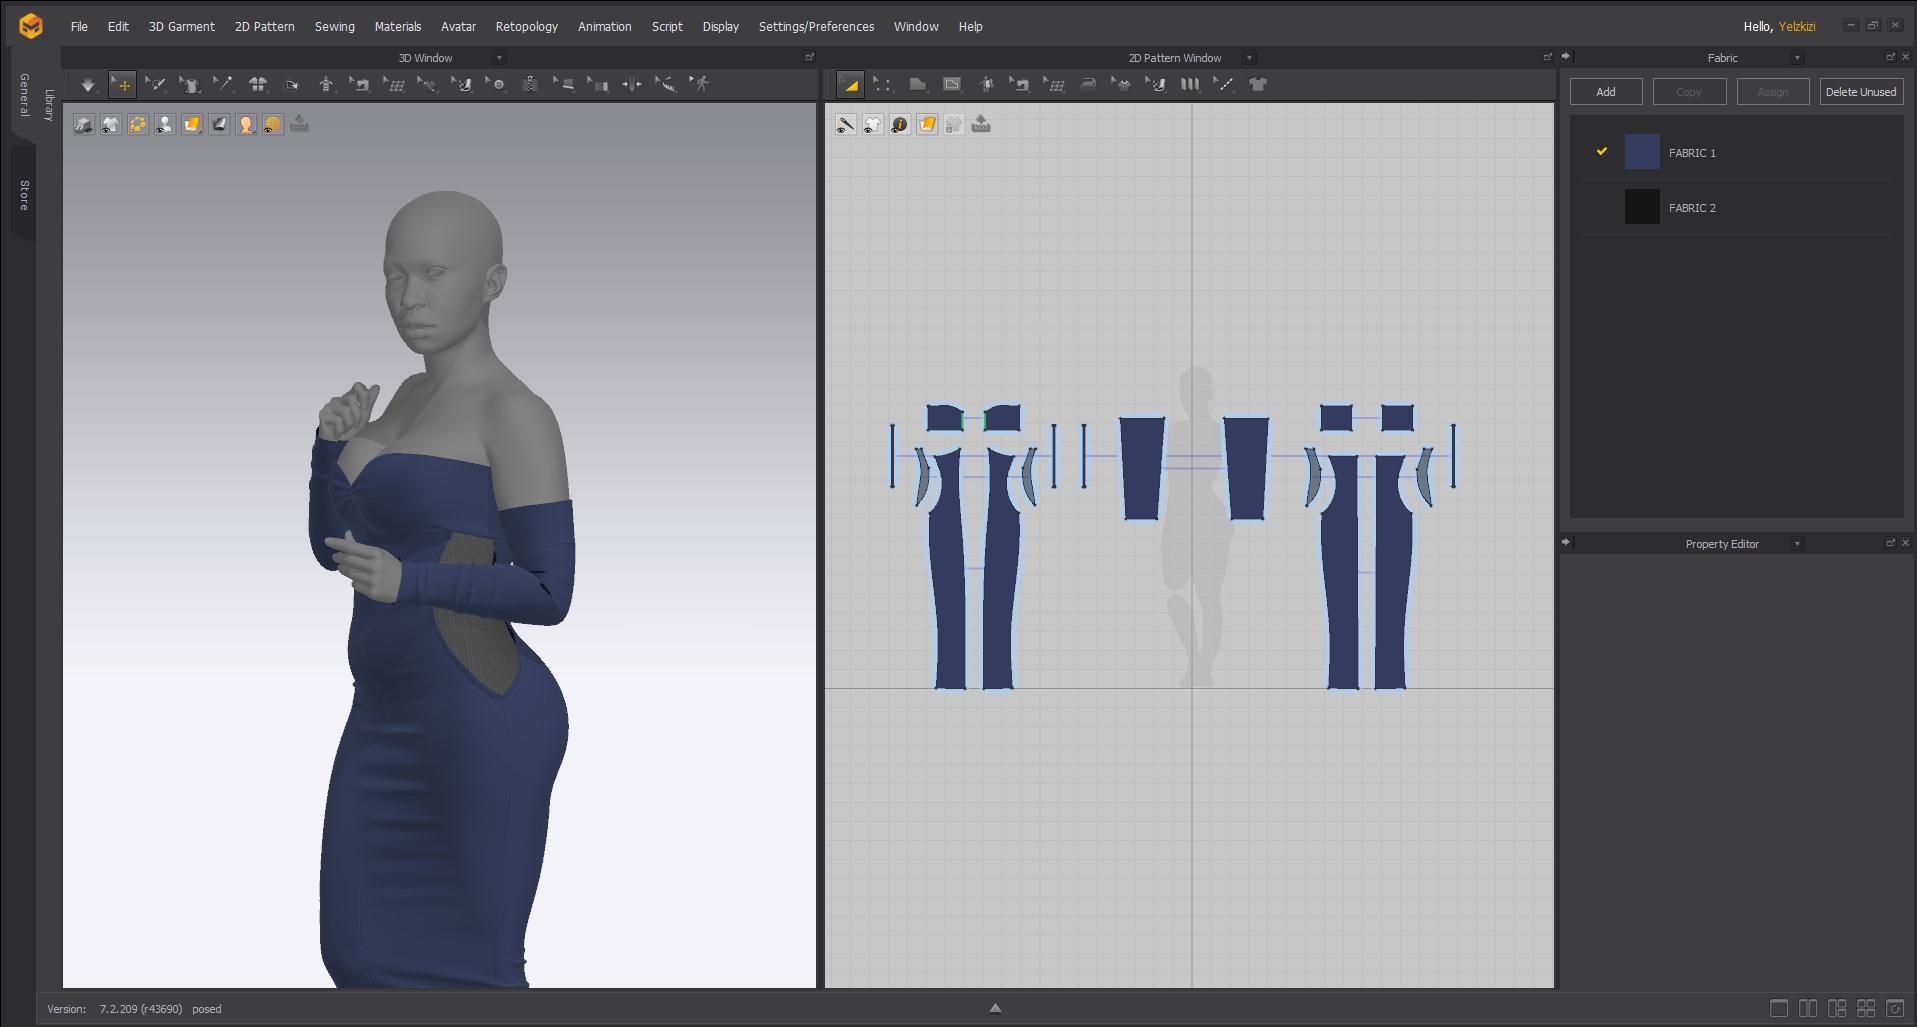
With the dress complete, I used Marvelous Designer's new retopology feature to create a retopologized version. I then imported this into Blender, where I merged it into one piece and created the UVs. This became my dress model. To project details from Marvelous Designer, I brought both the dress model and the original dress into ZBrush, where I projected and added my own details. After that, I took the dress to Substance Painter for texturing, as I prefer Substance for texturing assets while Mari is better suited for characters.
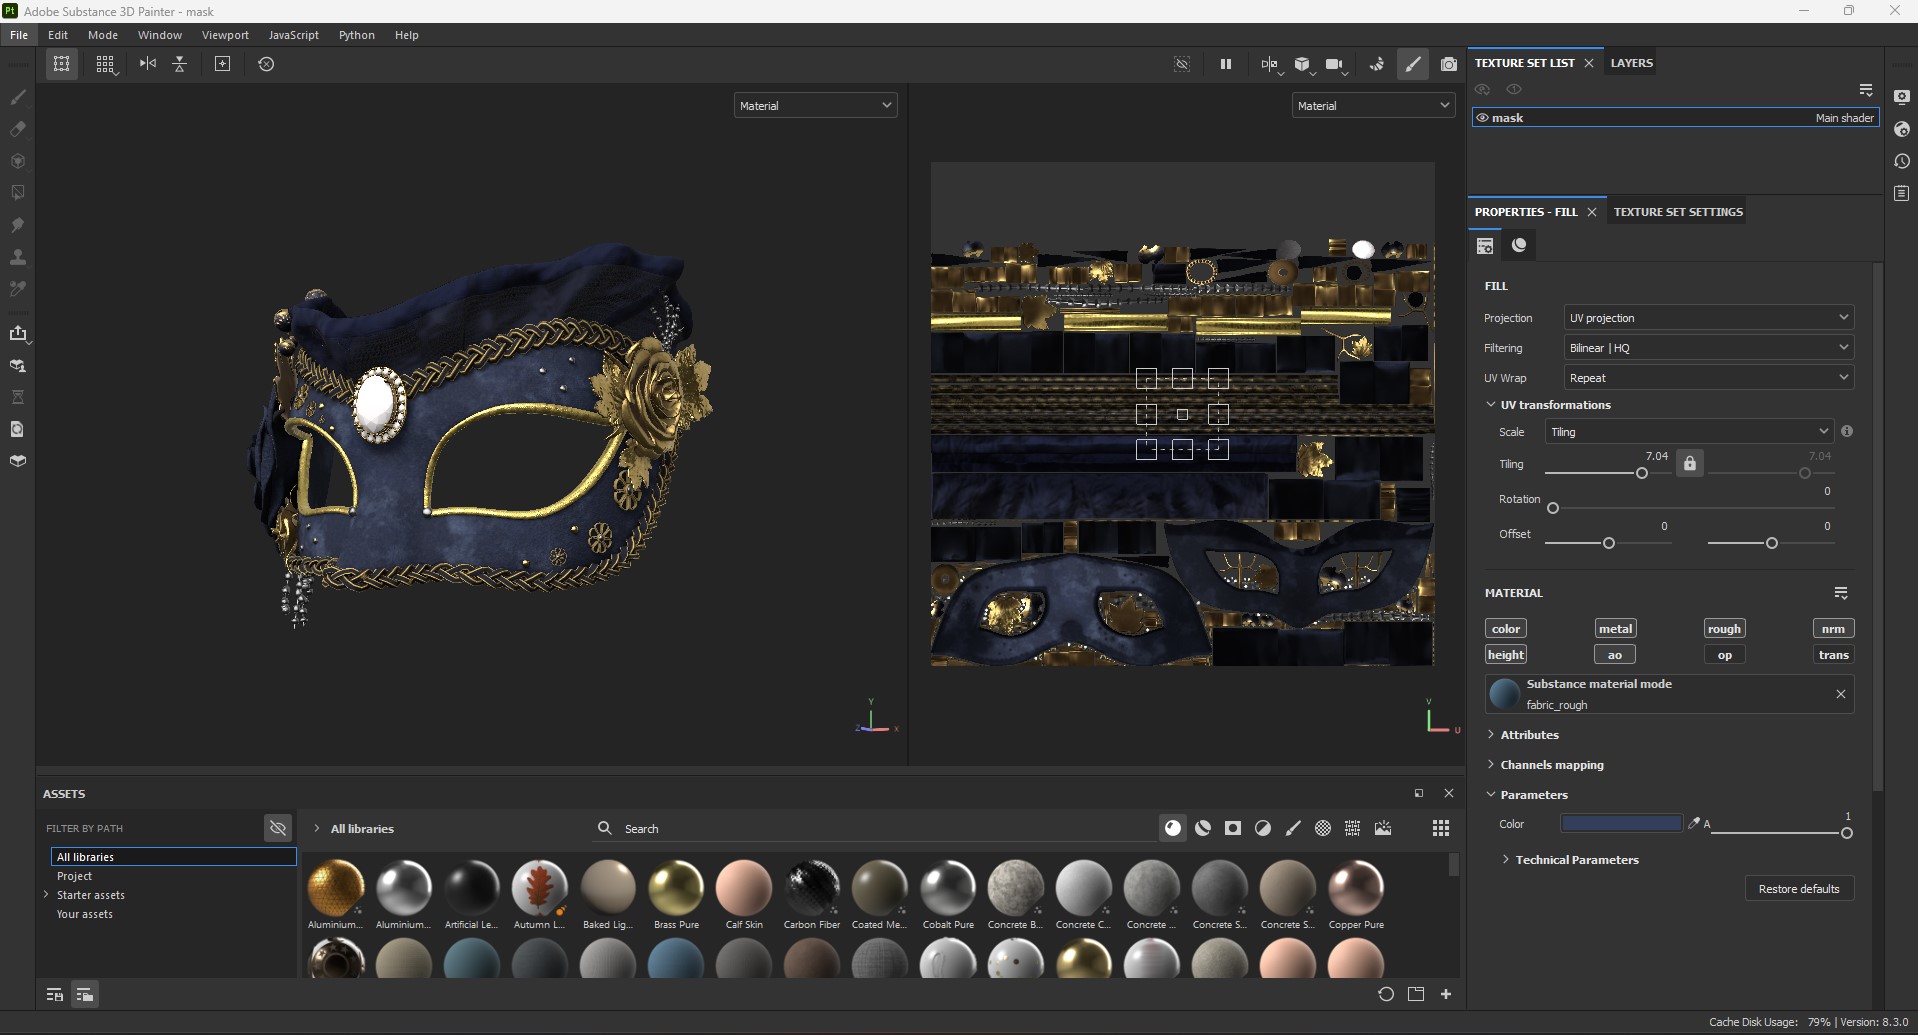
Once the dress was done, I began modeling the other assets that were part of her look, starting with the mask. I created the mask in Blender. I began by making a mesh of her face in ZBrush, then imported it into Blender for retopology. I used this base to model the rest of the mask and its components. After finishing the model, I worked on the UVs and then textured it in Substance Painter.
With the mask completed, I returned to Blender to model the jewelry. This process was less complicated than creating the mask, as I could design one piece, UV it, and then use the array and curve modifiers to duplicate and position it around the desired body part.
Environment
I started modeling a small room using a default cube in Blender, creating openings for the windows. I set up the camera to easily compare with the reference. My goal wasn’t to recreate the reference exactly but to capture the same vibe.
Once the window openings were completed, I made a window frame. Although it wouldn’t be visible, the shadows from the frame were crucial for the scene. Next, I went to Marvelous Designer to create the curtains. After retopologizing in Marvelous Designer, I imported the curtains into Blender, worked on the UVs, and then took them to Substance Painter for texturing. With the textures completed, I created a simple material and applied the textures in Blender.
Instead of moving back and forth between ZBrush and Blender to create a more solid curtain mesh, I used a solidify modifier, which worked well. For the other assets, I downloaded models from CGTrader and Sketchfab, placing them in areas that made the most sense for the composition.
Look-dev and Lighting
With the textures for Alora already created, the look development was relatively straightforward. I set up a simple material with the textures applied. The camera had already been positioned from when I created the environment. I added sunlight to the scene coming through the window and included some additional area lights in the room to soften the sunlight. With everything set up, it was just a matter of tweaking and experimenting with settings to find what looked best.

Hair Groom
For the hairstyle, I wanted something more natural, as I find that more attractive. I searched Pinterest for inspiration and decided that a curly messy bun suited her style and the vibe I was aiming for.

With the hairstyle chosen, I began the hair grooming process using Blender's hair particle system. Given my extensive experience with Blender's hair particle system, as showcased with PixelHair at yelzkizi.org, this was a natural choice.
I started by creating a scalp mesh. I did this by selecting the scalp region of the base mesh, duplicating it, and separating it so it became its own mesh. I then began grooming the base of the hair and added stray strands to achieve a messy look, ensuring the edges blended well with her skin color.
Next, I focused on the bun. I added a torus, scaled it to the appropriate size, and positioned it correctly. Using this torus, I created the hair, applying the same grooming process. The key difference was using the curl kink to achieve the curly texture. I also added stray hair strands to the bun, making them a bit messier than those on the base. I repeated the same process for the two strands at the front of her face.

Hair creation can be complex, and I can’t cover it all here. If you're interested in learning more, you can check out the hair creation course at yelzkizi.org.
Rendering & Post-production
With everything set and in place, I hit render. The initial render looked pretty good on its own. As I'm not a big fan of post-render compositing, I focus on pouring most of my creative energy into the render itself. After the render was complete, I added some glare to the jewelry and applied ambient occlusion using Blender's compositor.
Next, I took the render into Photoshop, where I adjusted the colors slightly and added a custom vignette to guide the viewer's eye to specific areas. And that was it! :)
RENDER: Alora (3D Albino Character)


Clay renders:


Thank you for reading my article, I hope you liked it. Have a great day!
About the Artist
Isaac Daniel, founder of Yelzkizi Ltd., is a 3D character artist specializing in Blender. Known for creating realistic characters and assets like PixelHair, his work showcases intricate detail and creativity in 3D art.